
Why Agents Matter
Testing voice agents manually doesn’t scale. Connecting your agent to Netra unlocks automated, repeatable evaluation:How It Works
Netra provides a way to interact with your connected voice agent:Run
Trigger a full evaluation against your agent. Netra places simulated calls for every scenario, records the conversation, runs evaluators, and reports results.
Agents Dashboard
Navigate to Library → Agents from the left navigation panel. The dashboard displays all configured agents for the current project.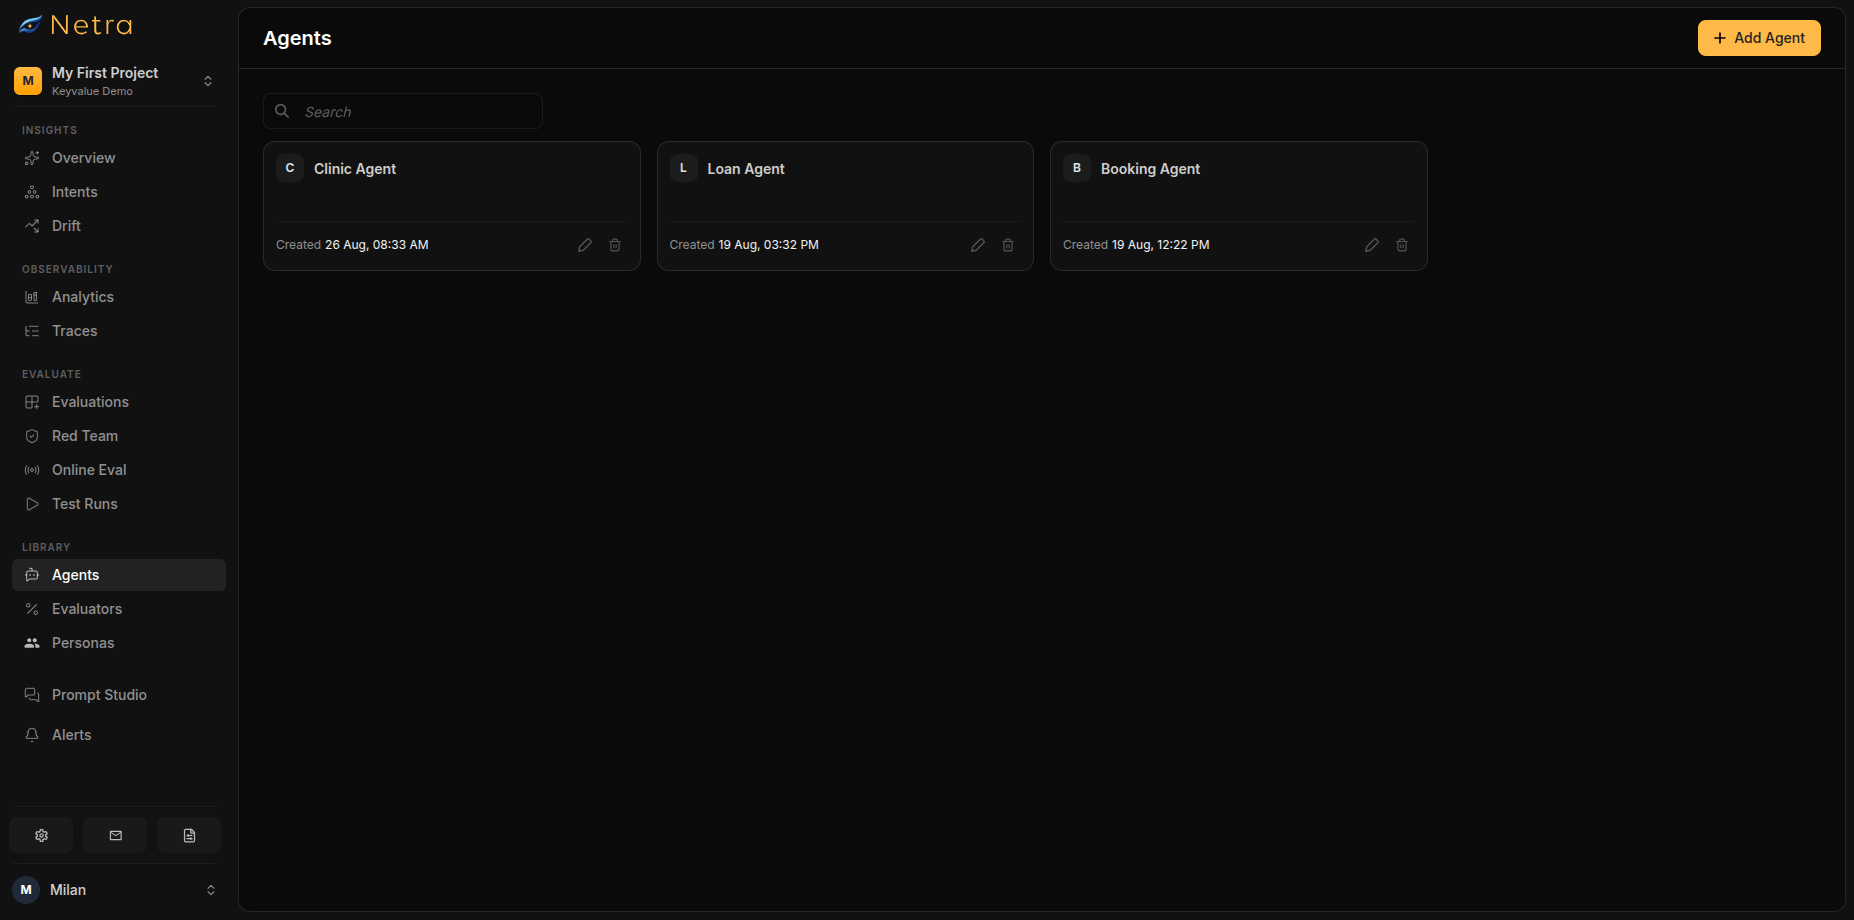
Configuring an Agent
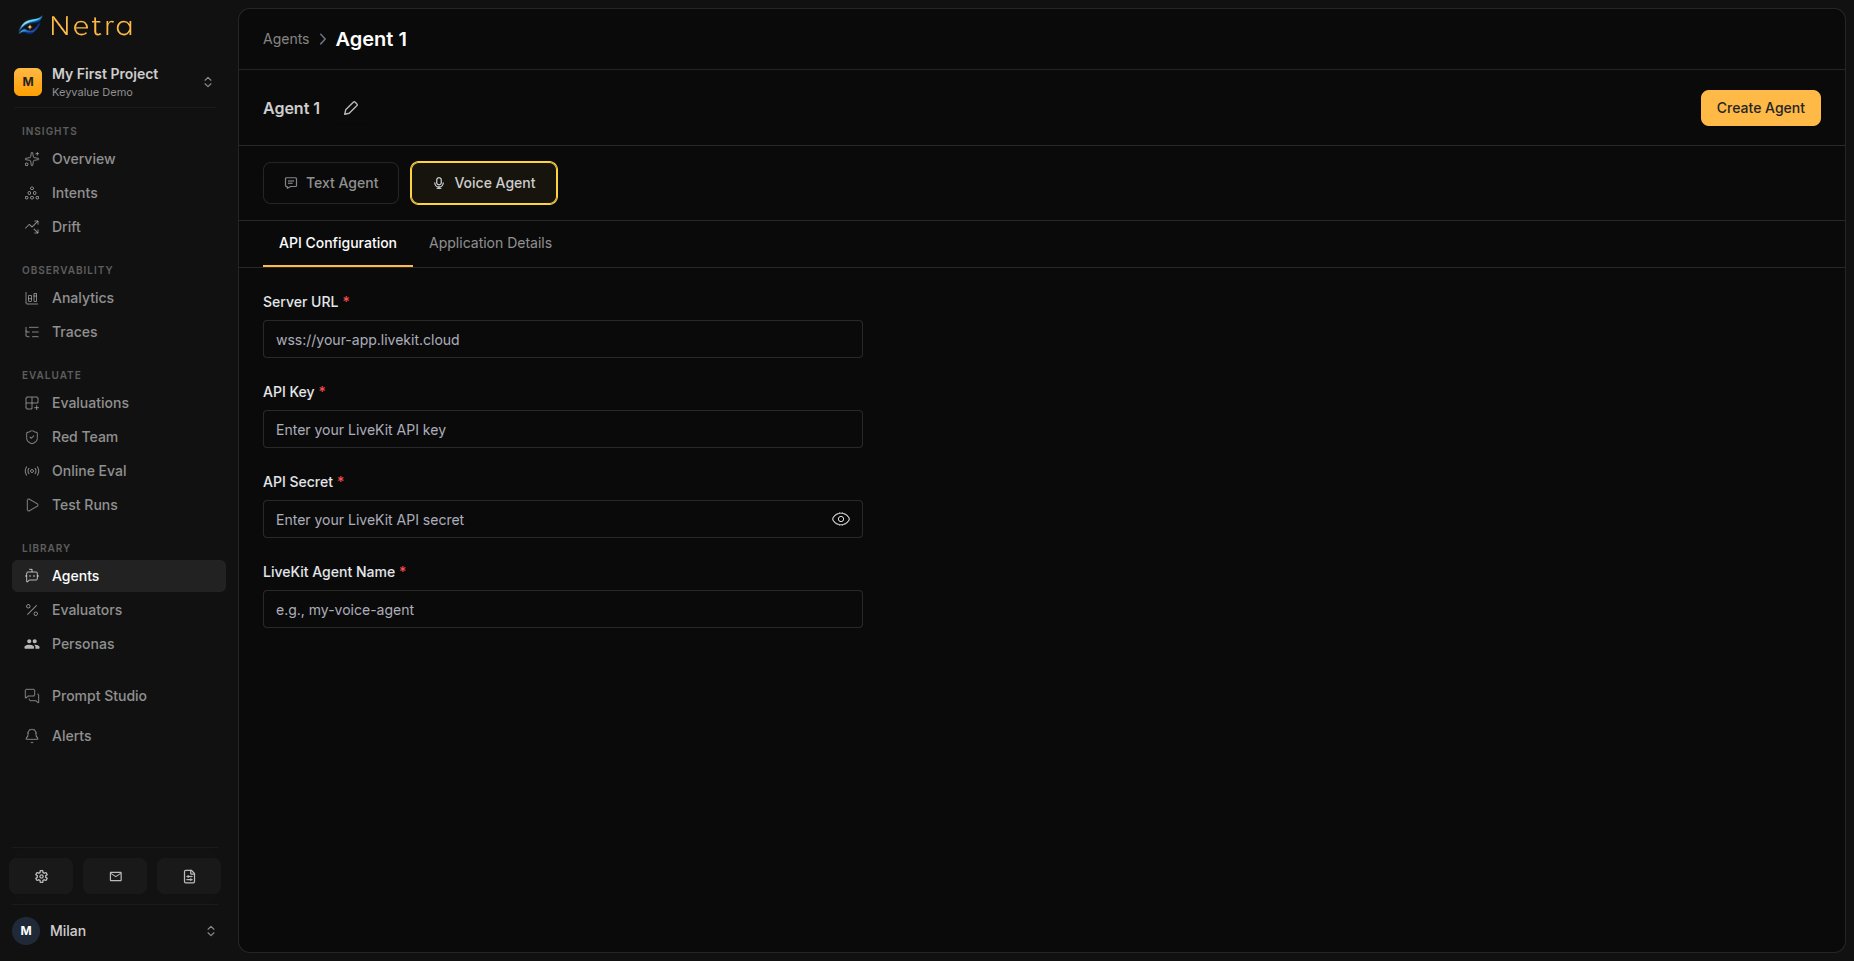
Click Add Agent in the top right corner to configure a new voice agent connection.1
Name Your Agent
Enter a descriptive name (e.g., “Customer Support Voice Bot - Staging”). This name identifies the agent when selecting it for runs.
2
Select Platform
Choose the platform your voice agent runs on:
3
Configure Connection
The configuration fields depend on your selected platform:LiveKit Configuration:
Vapi Configuration:
Websocket Configuration:
Your backend POSTs one end-of-call report per call to Netra’s webhook, authenticated with the Netra API key — it is static, the same for every call, which is why the report carries
call.id to identify itself. The full protocol is in Websockets.Coming soon. Custom agents are not yet configurable in the dashboard. The protocol is settled if you want to build against it now.
4
Add Application Details
Describe what your agent does. This context helps Netra simulate realistic callers when running tests:
5
Save
Click Create Agent to save the configuration. The agent becomes available for runs and appears on the Agents dashboard.
Triggering a Run
This is the primary workflow for running an entire Evaluation against a configured voice agent from the UI.Prerequisites
Before triggering a run, ensure you have:- At least one Agent configured in the current project
- An Evaluation with voice scenarios
- Evaluators attached to the evaluation for scoring
Starting a Run
1
Open Your Evaluation
Navigate to Evaluate → Evaluations and open the voice evaluation you want to run.
2
Click Run
In the evaluation detail page toolbar, click the Run button.
3
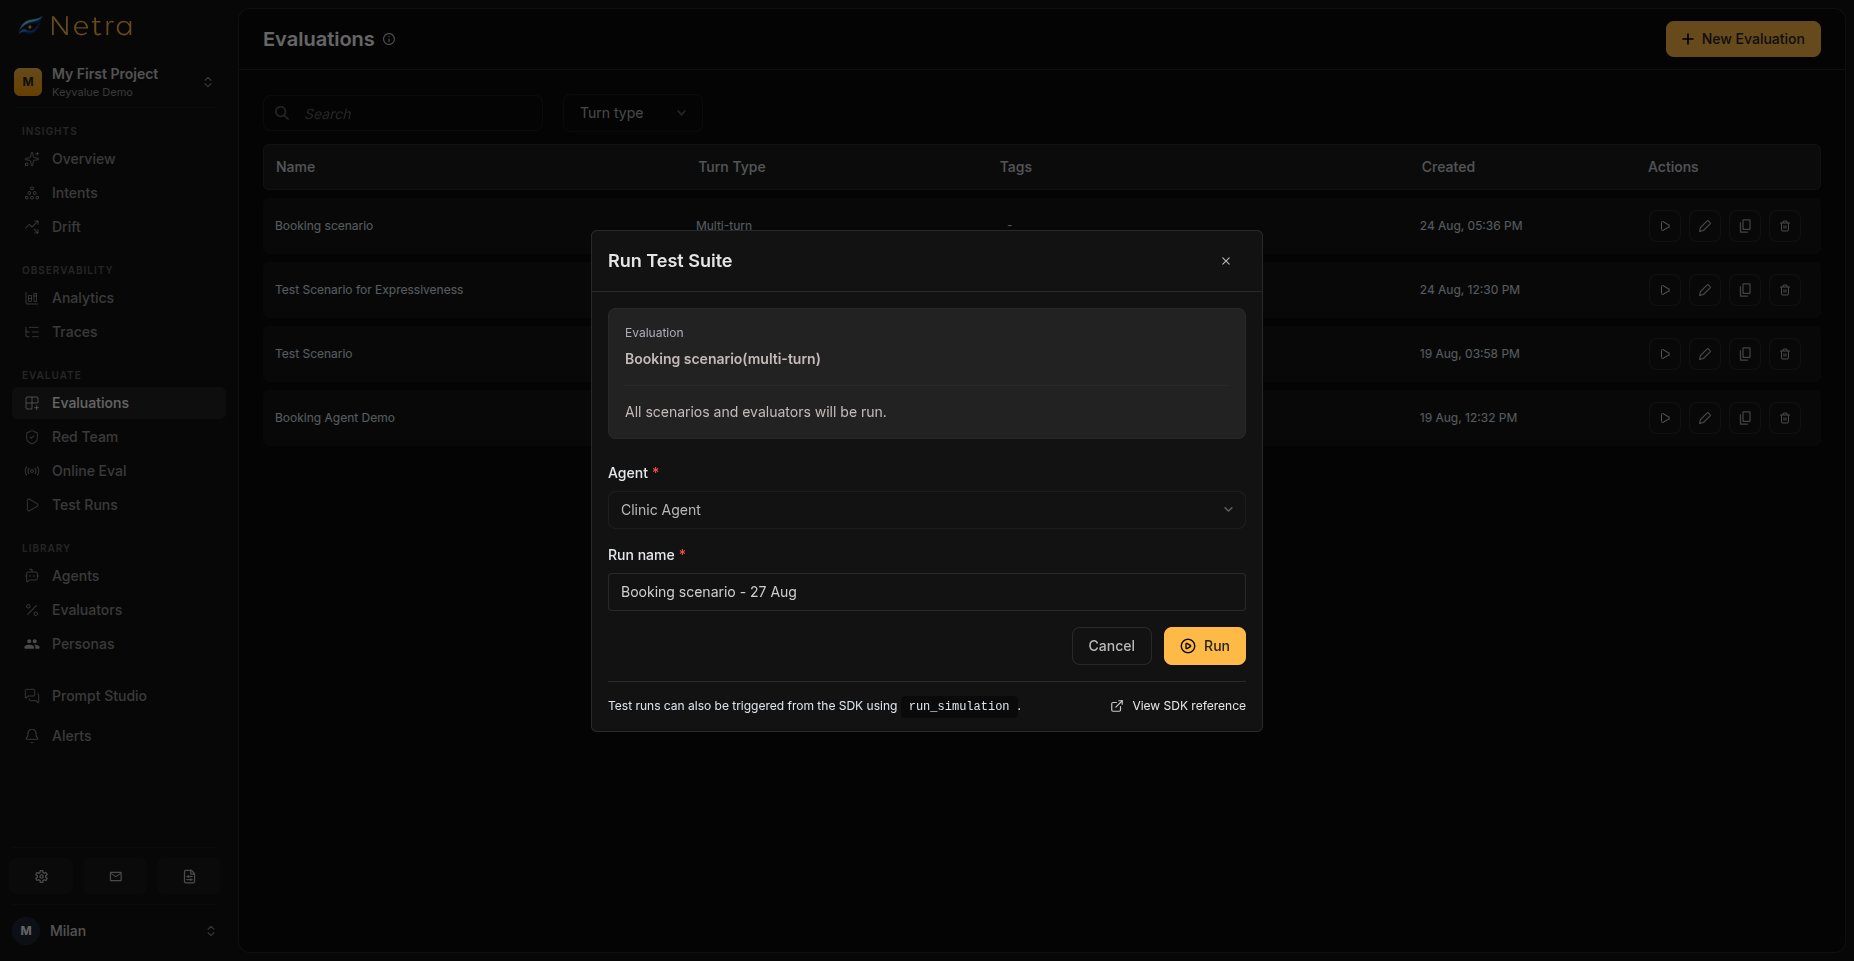
Configure the Run
The Run modal appears with the following fields:
The modal also displays read-only context: evaluation name, scenario count, and evaluator count.
4
Confirm and Run
Click Run to start the simulation. On success, you are redirected to the Test Run detail page to monitor progress.
Monitoring Results
After triggering a run, you land on the Test Run detail page. The page updates as calls complete.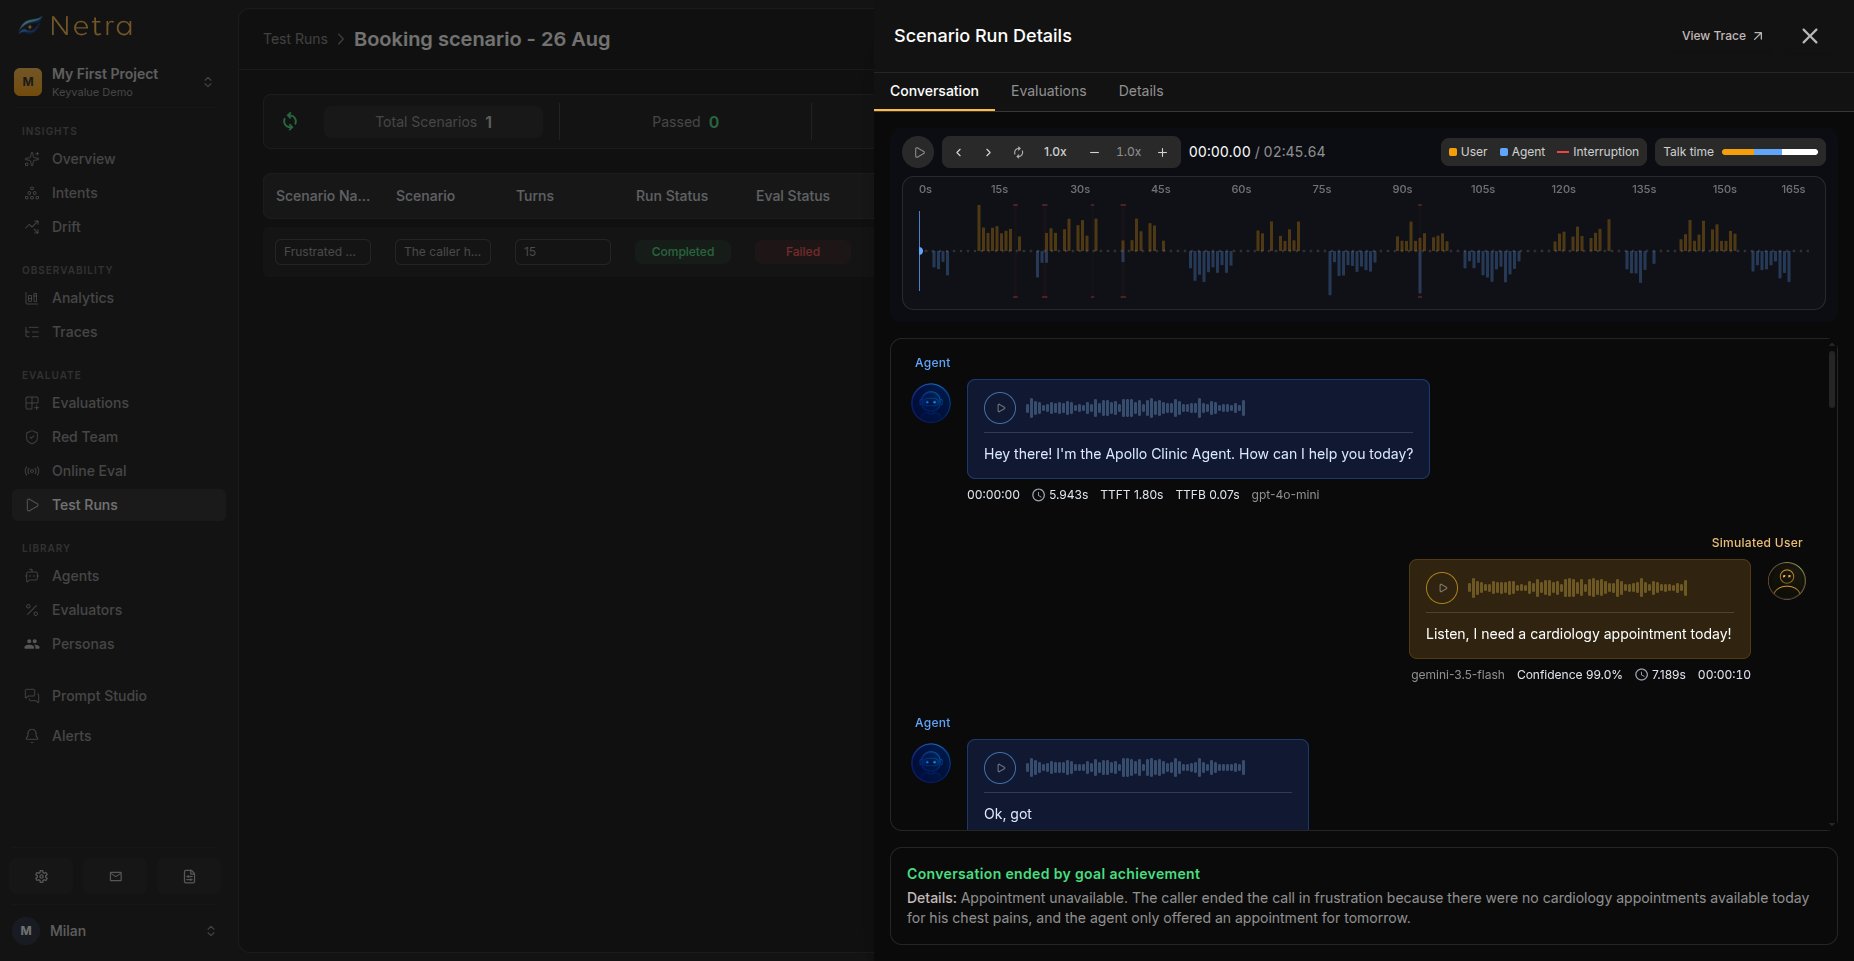
Status Summary
The summary card at the top shows aggregate metrics:
Use the refresh button to update the summary while the run is in progress.
Run Statuses
Per-Item Results
Each scenario in the results table shows:
Click any row to view detailed evaluation results, the full conversation transcript with synced audio playback, or the complete execution trace.
Related
- Simulation Overview — Understand the full simulation framework
- Evaluations — Create voice test scenarios for your agents
- Personas — Create reusable caller personas with voice traits
- Evaluators — Configure audio and conversation scoring logic
- Test Runs — View transcripts and synced call audio
- Websockets — Connect an agent you host yourself
- Quick Start: Simulation — Get your first simulation running in minutes