
Why Agents Matter
Testing text agents manually doesn’t scale. Connecting your agent to Netra unlocks automated, repeatable evaluation:How It Works
Netra provides two ways to interact with your connected agent:Playground
Send individual messages to your agent in an interactive chat. Ideal for quick validation while configuring endpoints and response mappings.
Simulation Run
Trigger a full simulation against your agent. Netra fans out every scenario, collects responses, runs evaluators, and reports results.
Agents Dashboard
Navigate to Simulations → Agents from the left navigation panel. The dashboard displays all configured agents for the current project.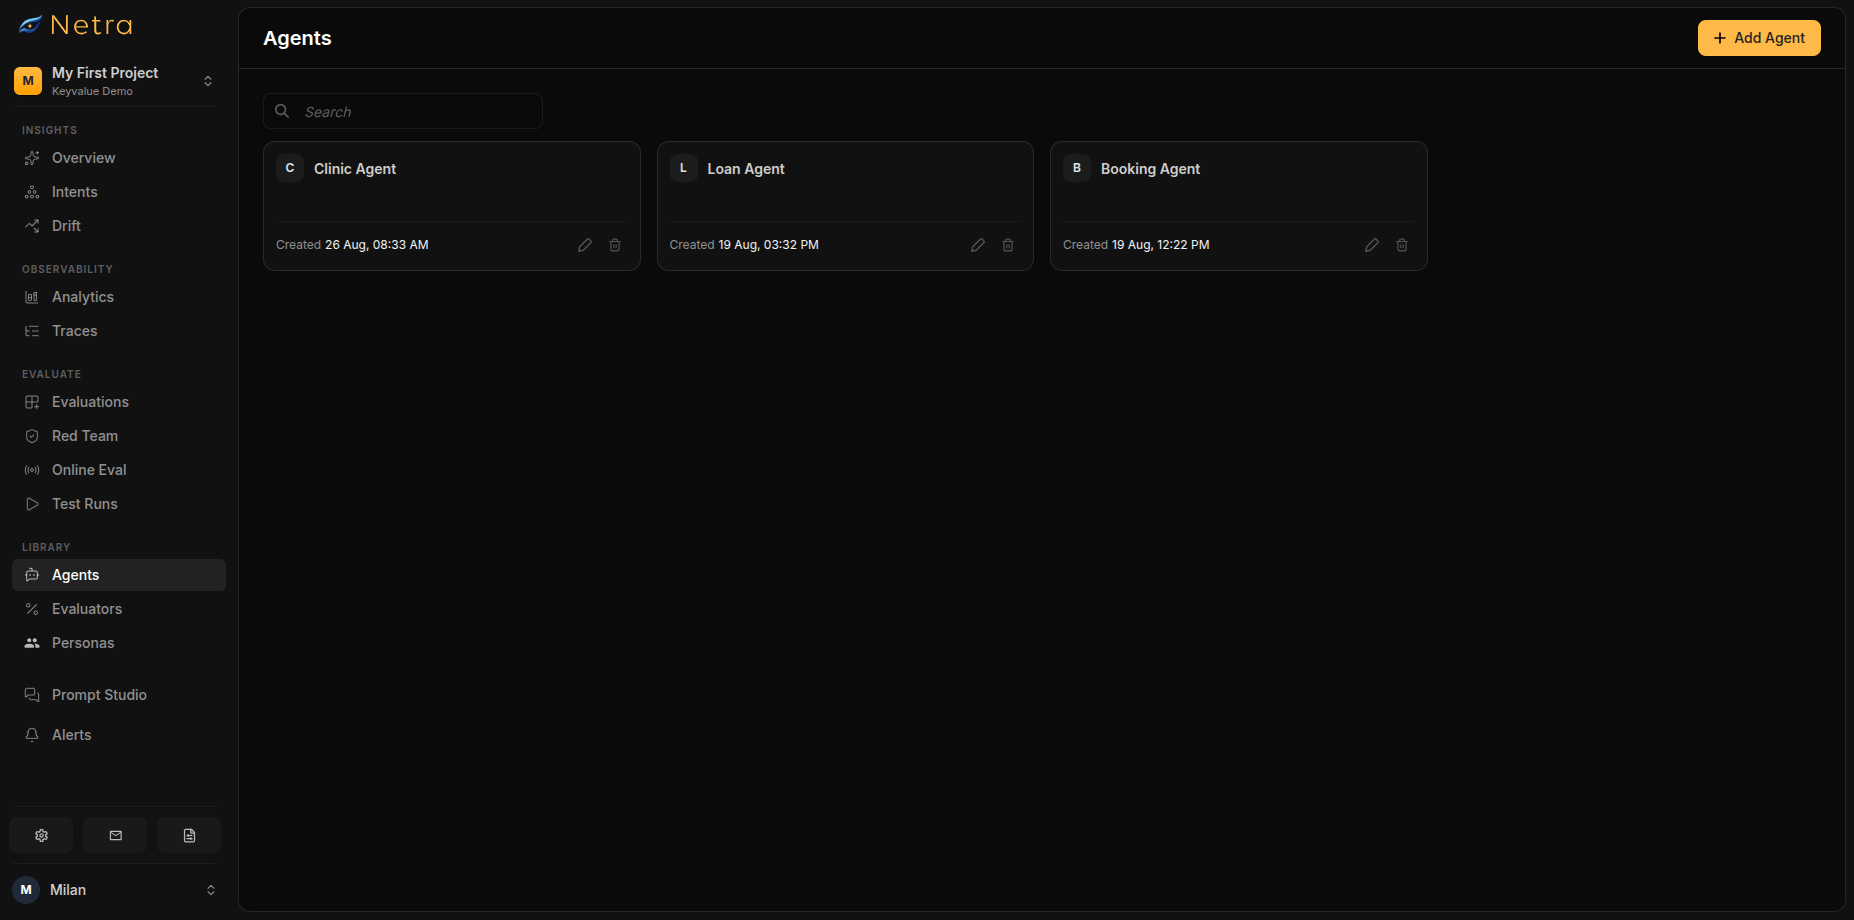
Configuring an Agent
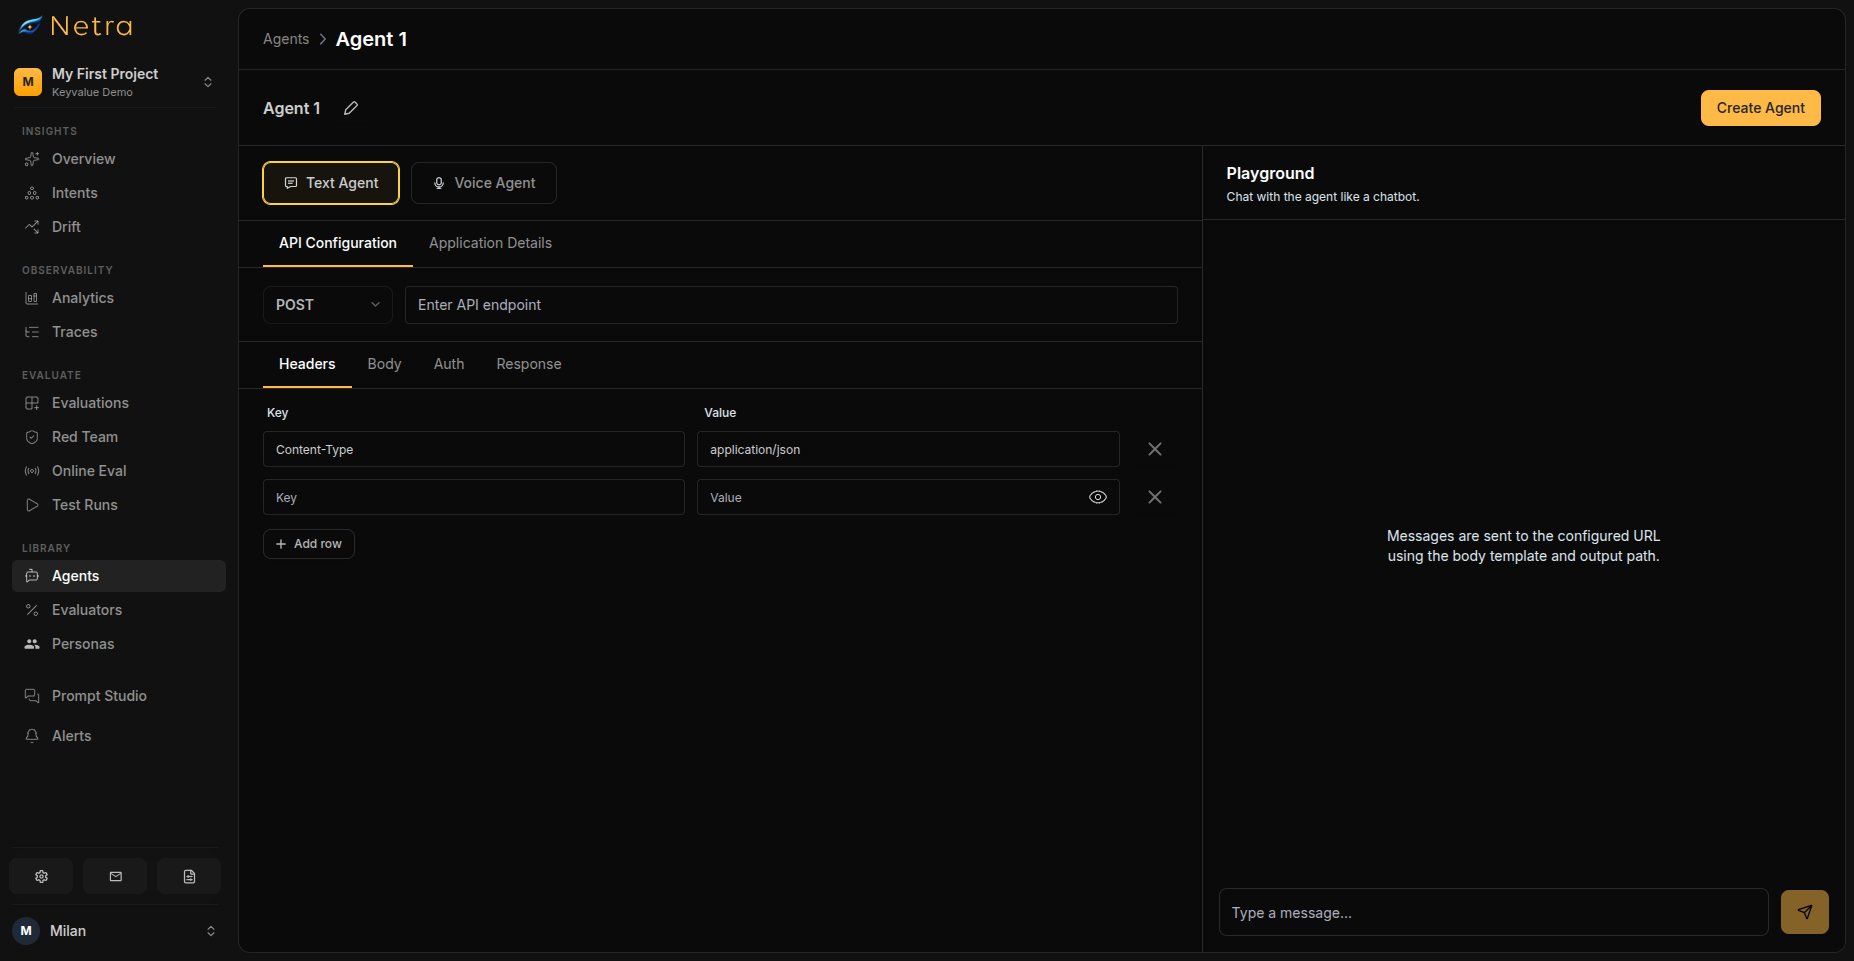
Click Add Agent in the top right corner to configure a new agent connection.1
Name Your Agent
Enter a descriptive name (e.g., “Customer Support Bot - Staging”). This name identifies the agent when selecting it for runs.
2
Configure Endpoint
Provide the HTTP endpoint Netra will call to reach your agent:
3
Configure Request Mapping
Map how Netra sends messages to your agent and reads responses back:
The default configuration sends
{"message": "{{message}}"} and reads the response from the top-level response field.4
Add Application Details
Describe what your agent does. This context helps Netra simulate realistic users when running tests:
5
Save
Click Create Agent to save the configuration. The agent becomes available for simulation runs and appears on the Agents dashboard.
Testing in the Playground
Before triggering a full simulation, validate your agent connection in the playground:- Open your agent from the dashboard
- Click Playground in the top right corner
- Send test messages and verify responses appear correctly
- Check that the response mapping extracts the right fields
Triggering a Simulation Run
This is the primary workflow for running an entire Simulation against a configured agent from the UI.Prerequisites
Before triggering a run, ensure you have:- At least one Agent configured in the current project
- A Simulation with multi-turn scenarios
- Evaluators attached to the simulation for scoring
Starting a Run
1
Open Your Simulation
Navigate to Simulations → Evaluations and open the simulation you want to run.
2
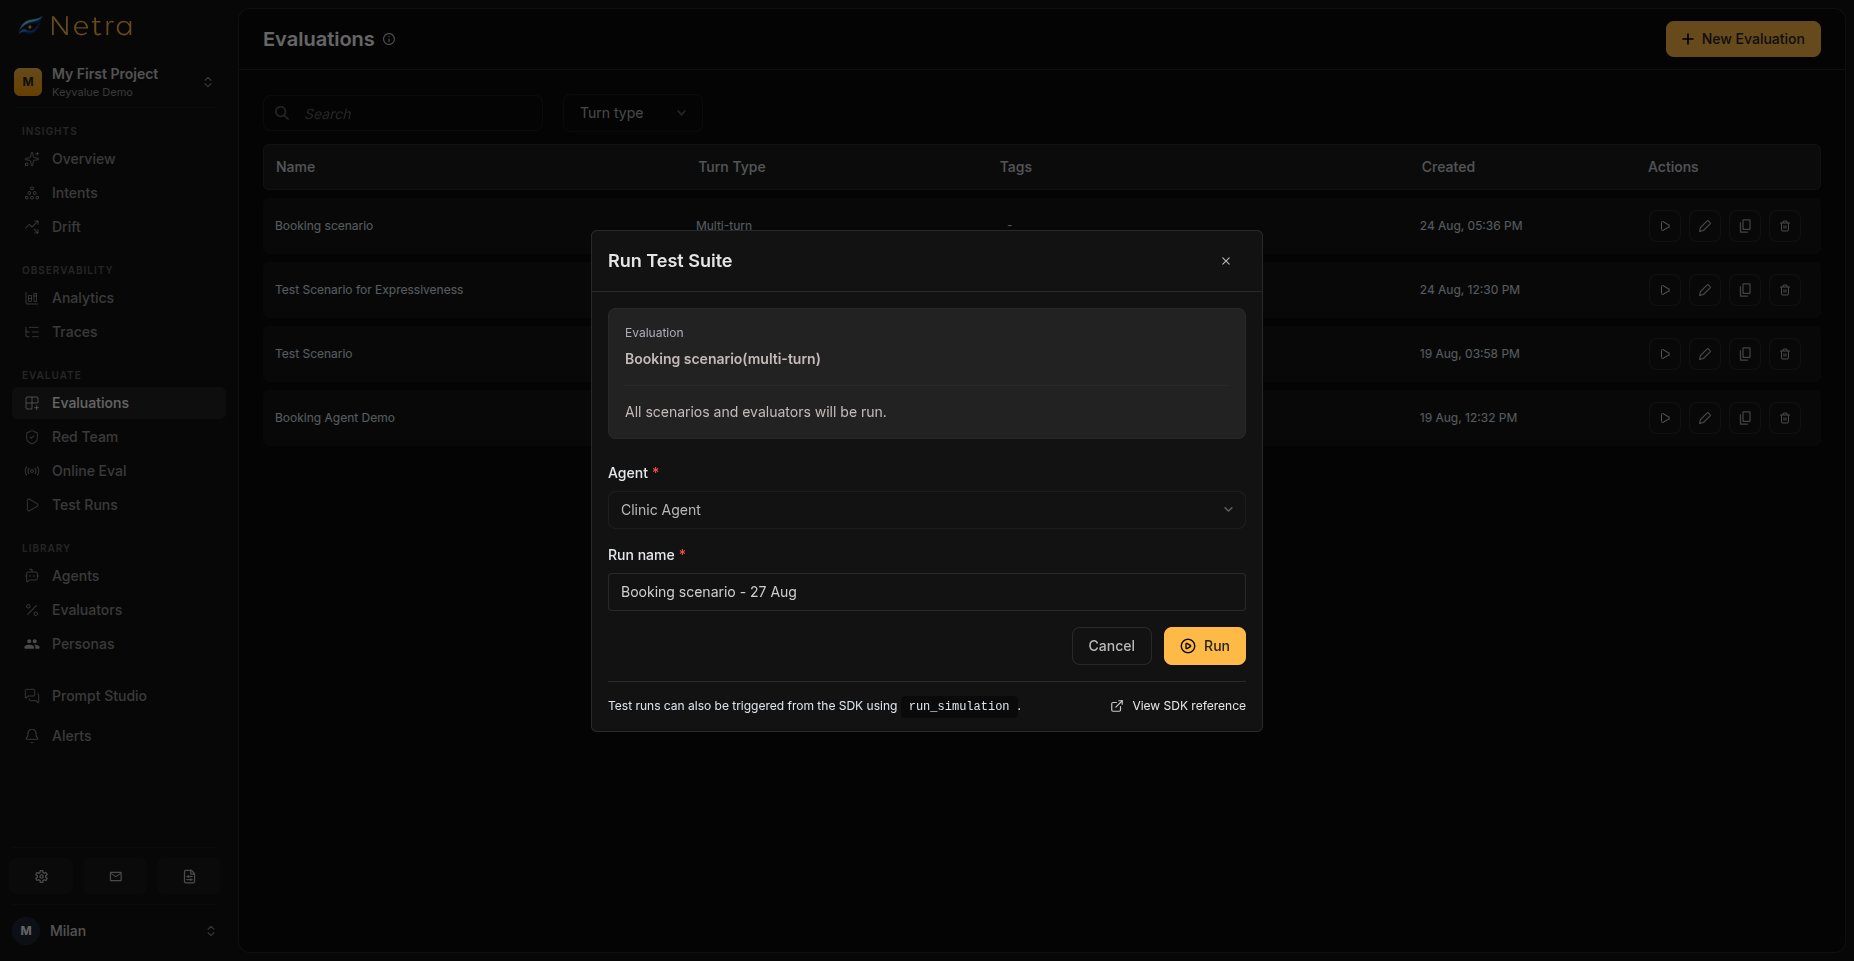
Click Run
In the simulation detail page toolbar, click the Run button.
3
Configure the Run
The Run modal appears with the following fields:
The modal also displays read-only context: simulation name, scenario count, and evaluator count.
4
Confirm and Run
Click Run to start the simulation. On success, you are redirected to the Test Run detail page to monitor progress.
Monitoring Results
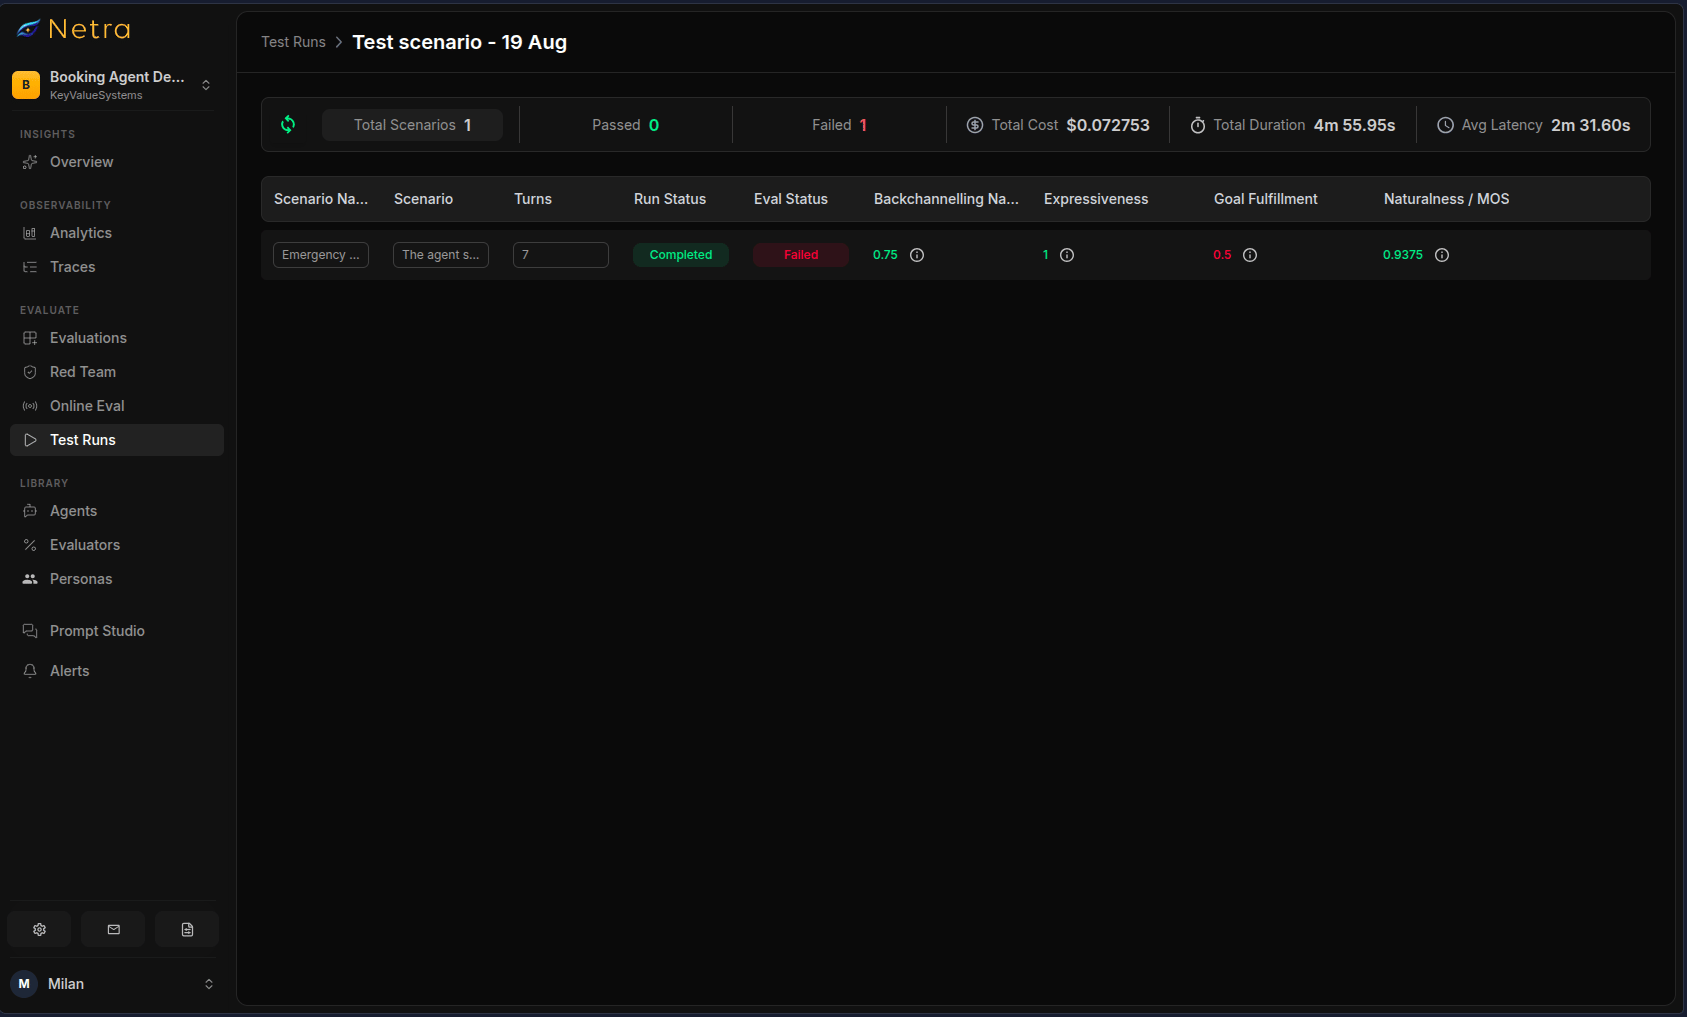
After triggering a run, you land on the Test Run detail page. The page updates as scenarios complete.Status Summary
The summary card at the top shows aggregate metrics:
Use the refresh button to update the summary while the run is in progress.
Run Statuses
Per-Item Results
Each scenario in the results table shows:
Click any row to view detailed evaluation results, the full conversation transcript, or the complete execution trace.
Related
- Simulation Overview — Understand the full simulation framework
- Evaluations — Create text simulation scenarios for your agents
- Evaluators — Configure text scoring logic
- Test Runs — View transcripts and per-scenario results
- Quick Start: Simulation — Get your first simulation running in minutes