
Why Image Evaluations Matter
Image evaluations transform ad-hoc visual testing into systematic quality assurance:Image Evaluation Dashboard
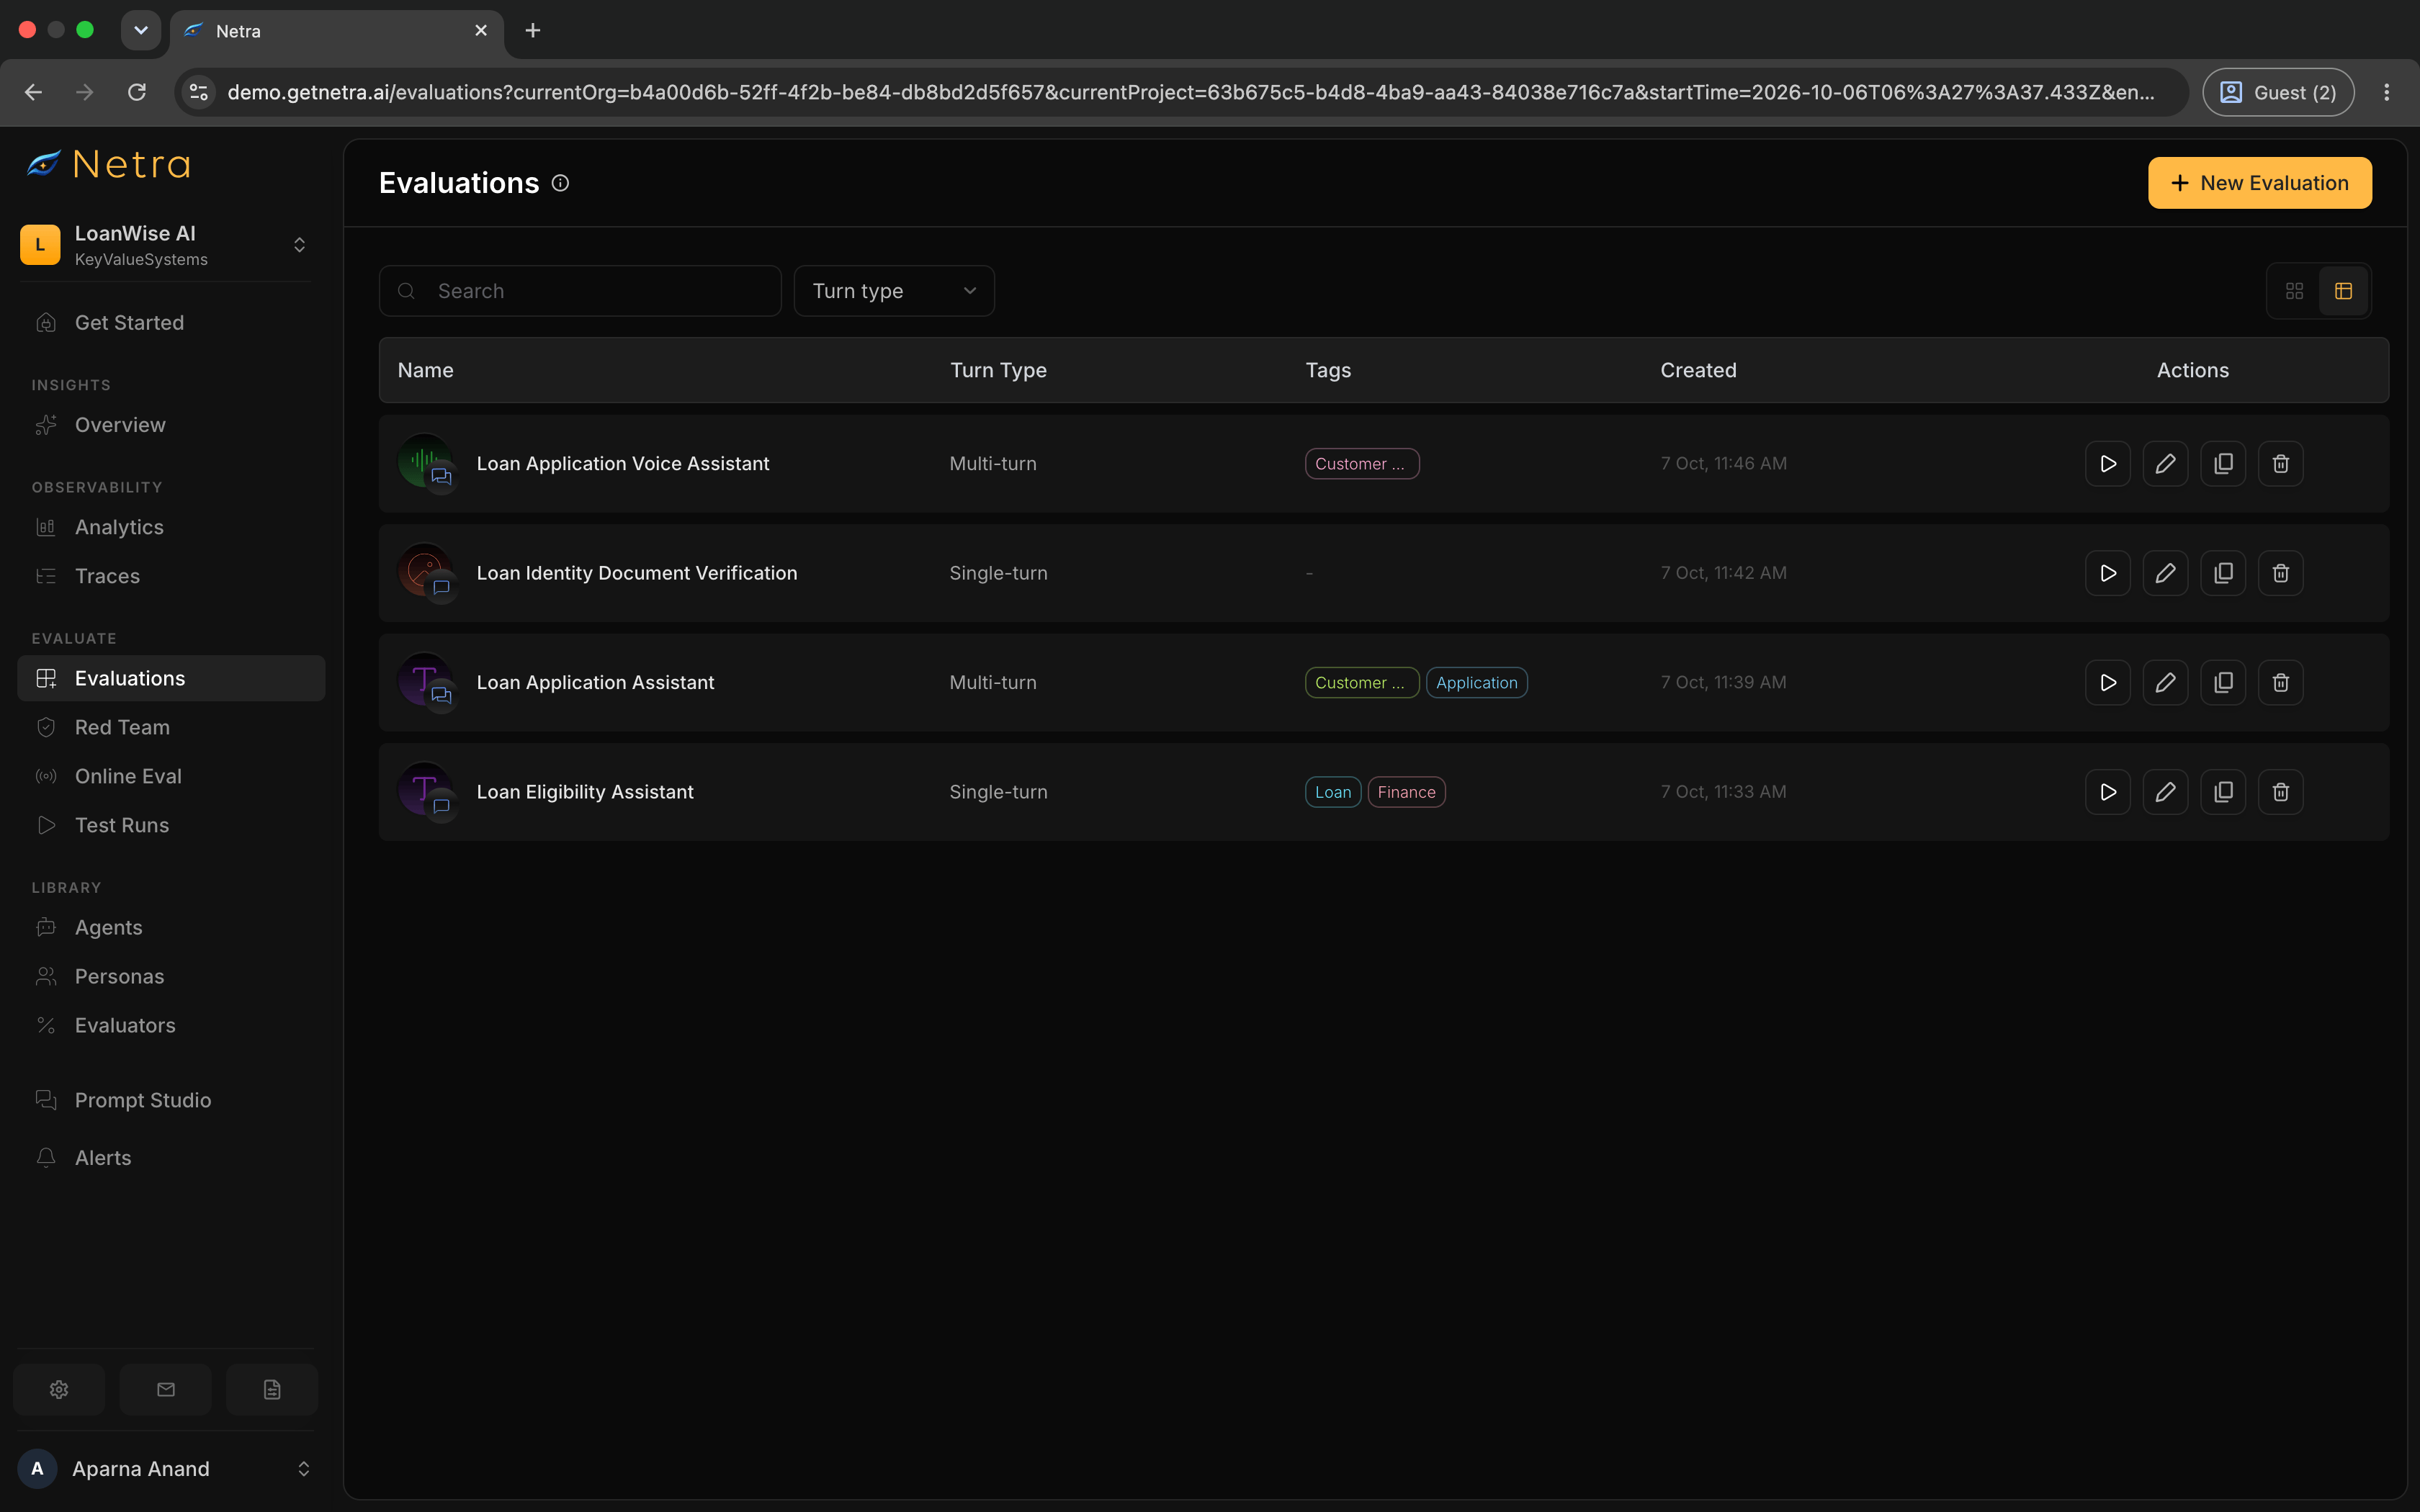
Navigate to Evaluate → Evaluations from the left navigation panel to access your evaluations. Switch between card and list views from the page toolbar. Each image evaluation shows an image type icon with a Single Turn badge at the bottom-right. Image evaluations are always Single Turn.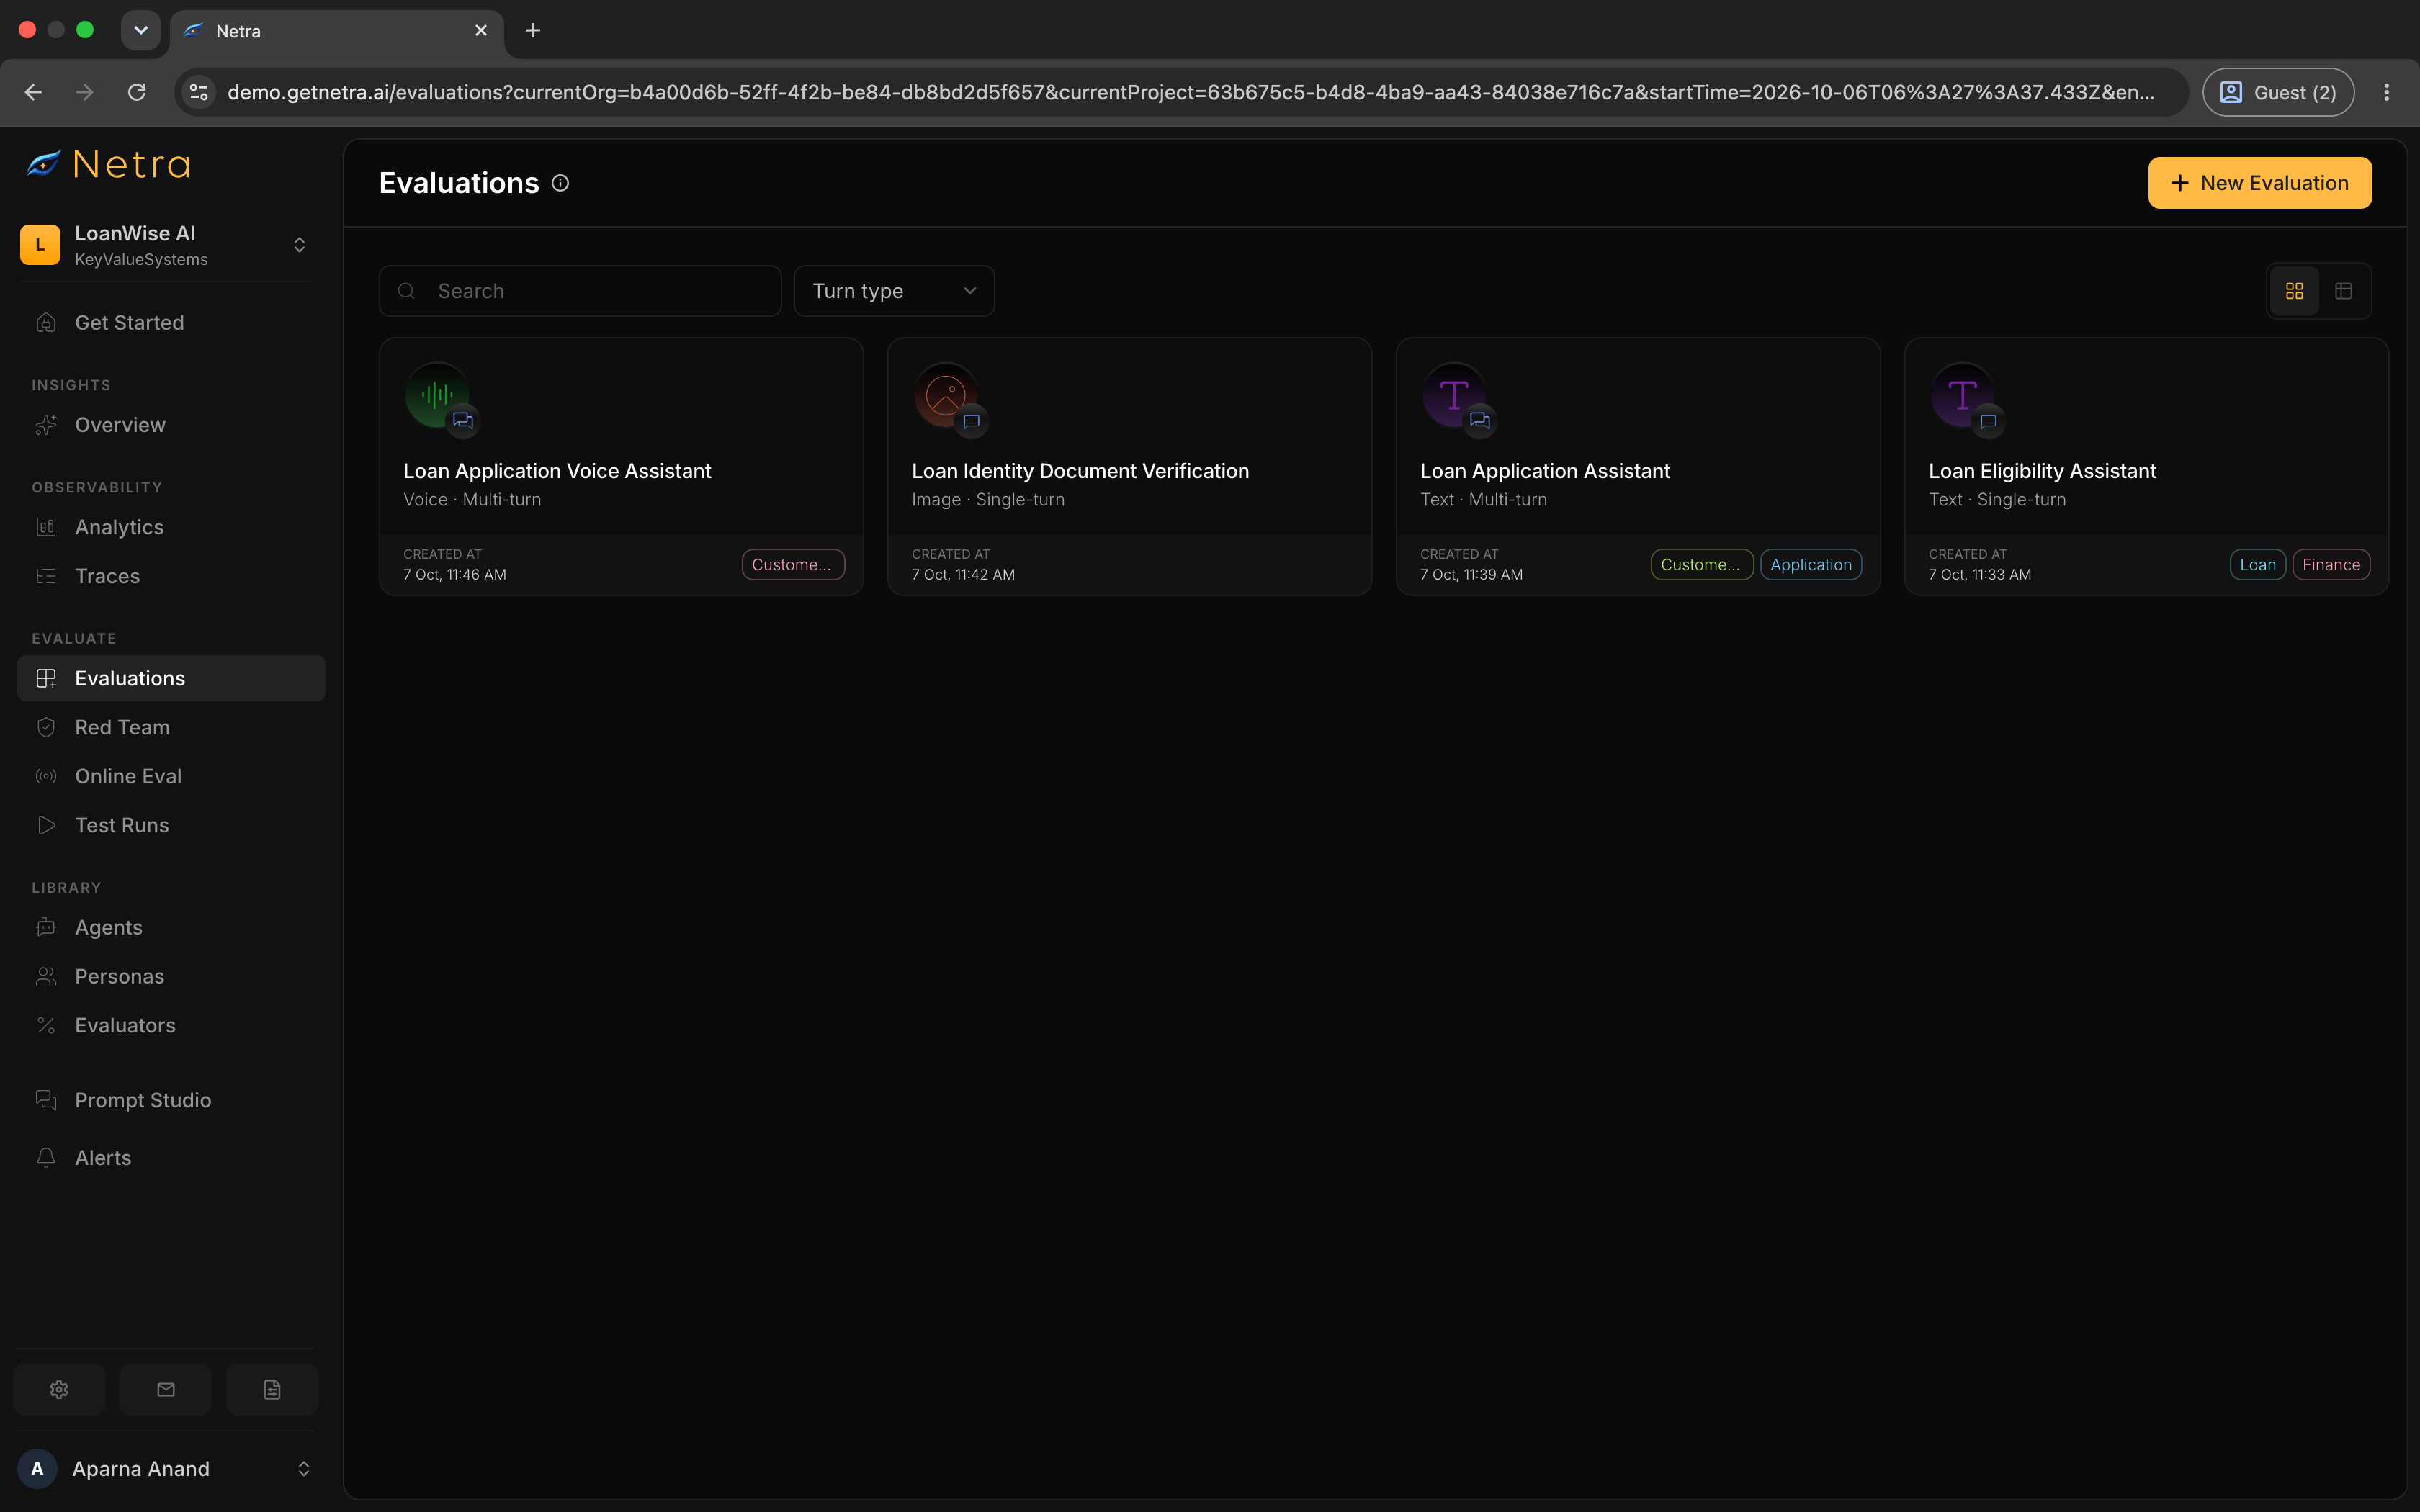
Image · Single Turn), tags, created date, a Run action, and a menu with Duplicate, Edit, and Delete.
Creating an Image Evaluation
Click New Evaluation in the top right corner of the Evaluations page.Add Manually
Build image test suites from scratch, one test case at a time
Upload CSV
Import a spreadsheet of image test cases in bulk
Image evaluations always use Single Turn. When you select Image as the
evaluation type, the conversation style is automatically set to Single Turn.
Creating Items Manually
1
Setup
Click New Evaluation and configure the basics: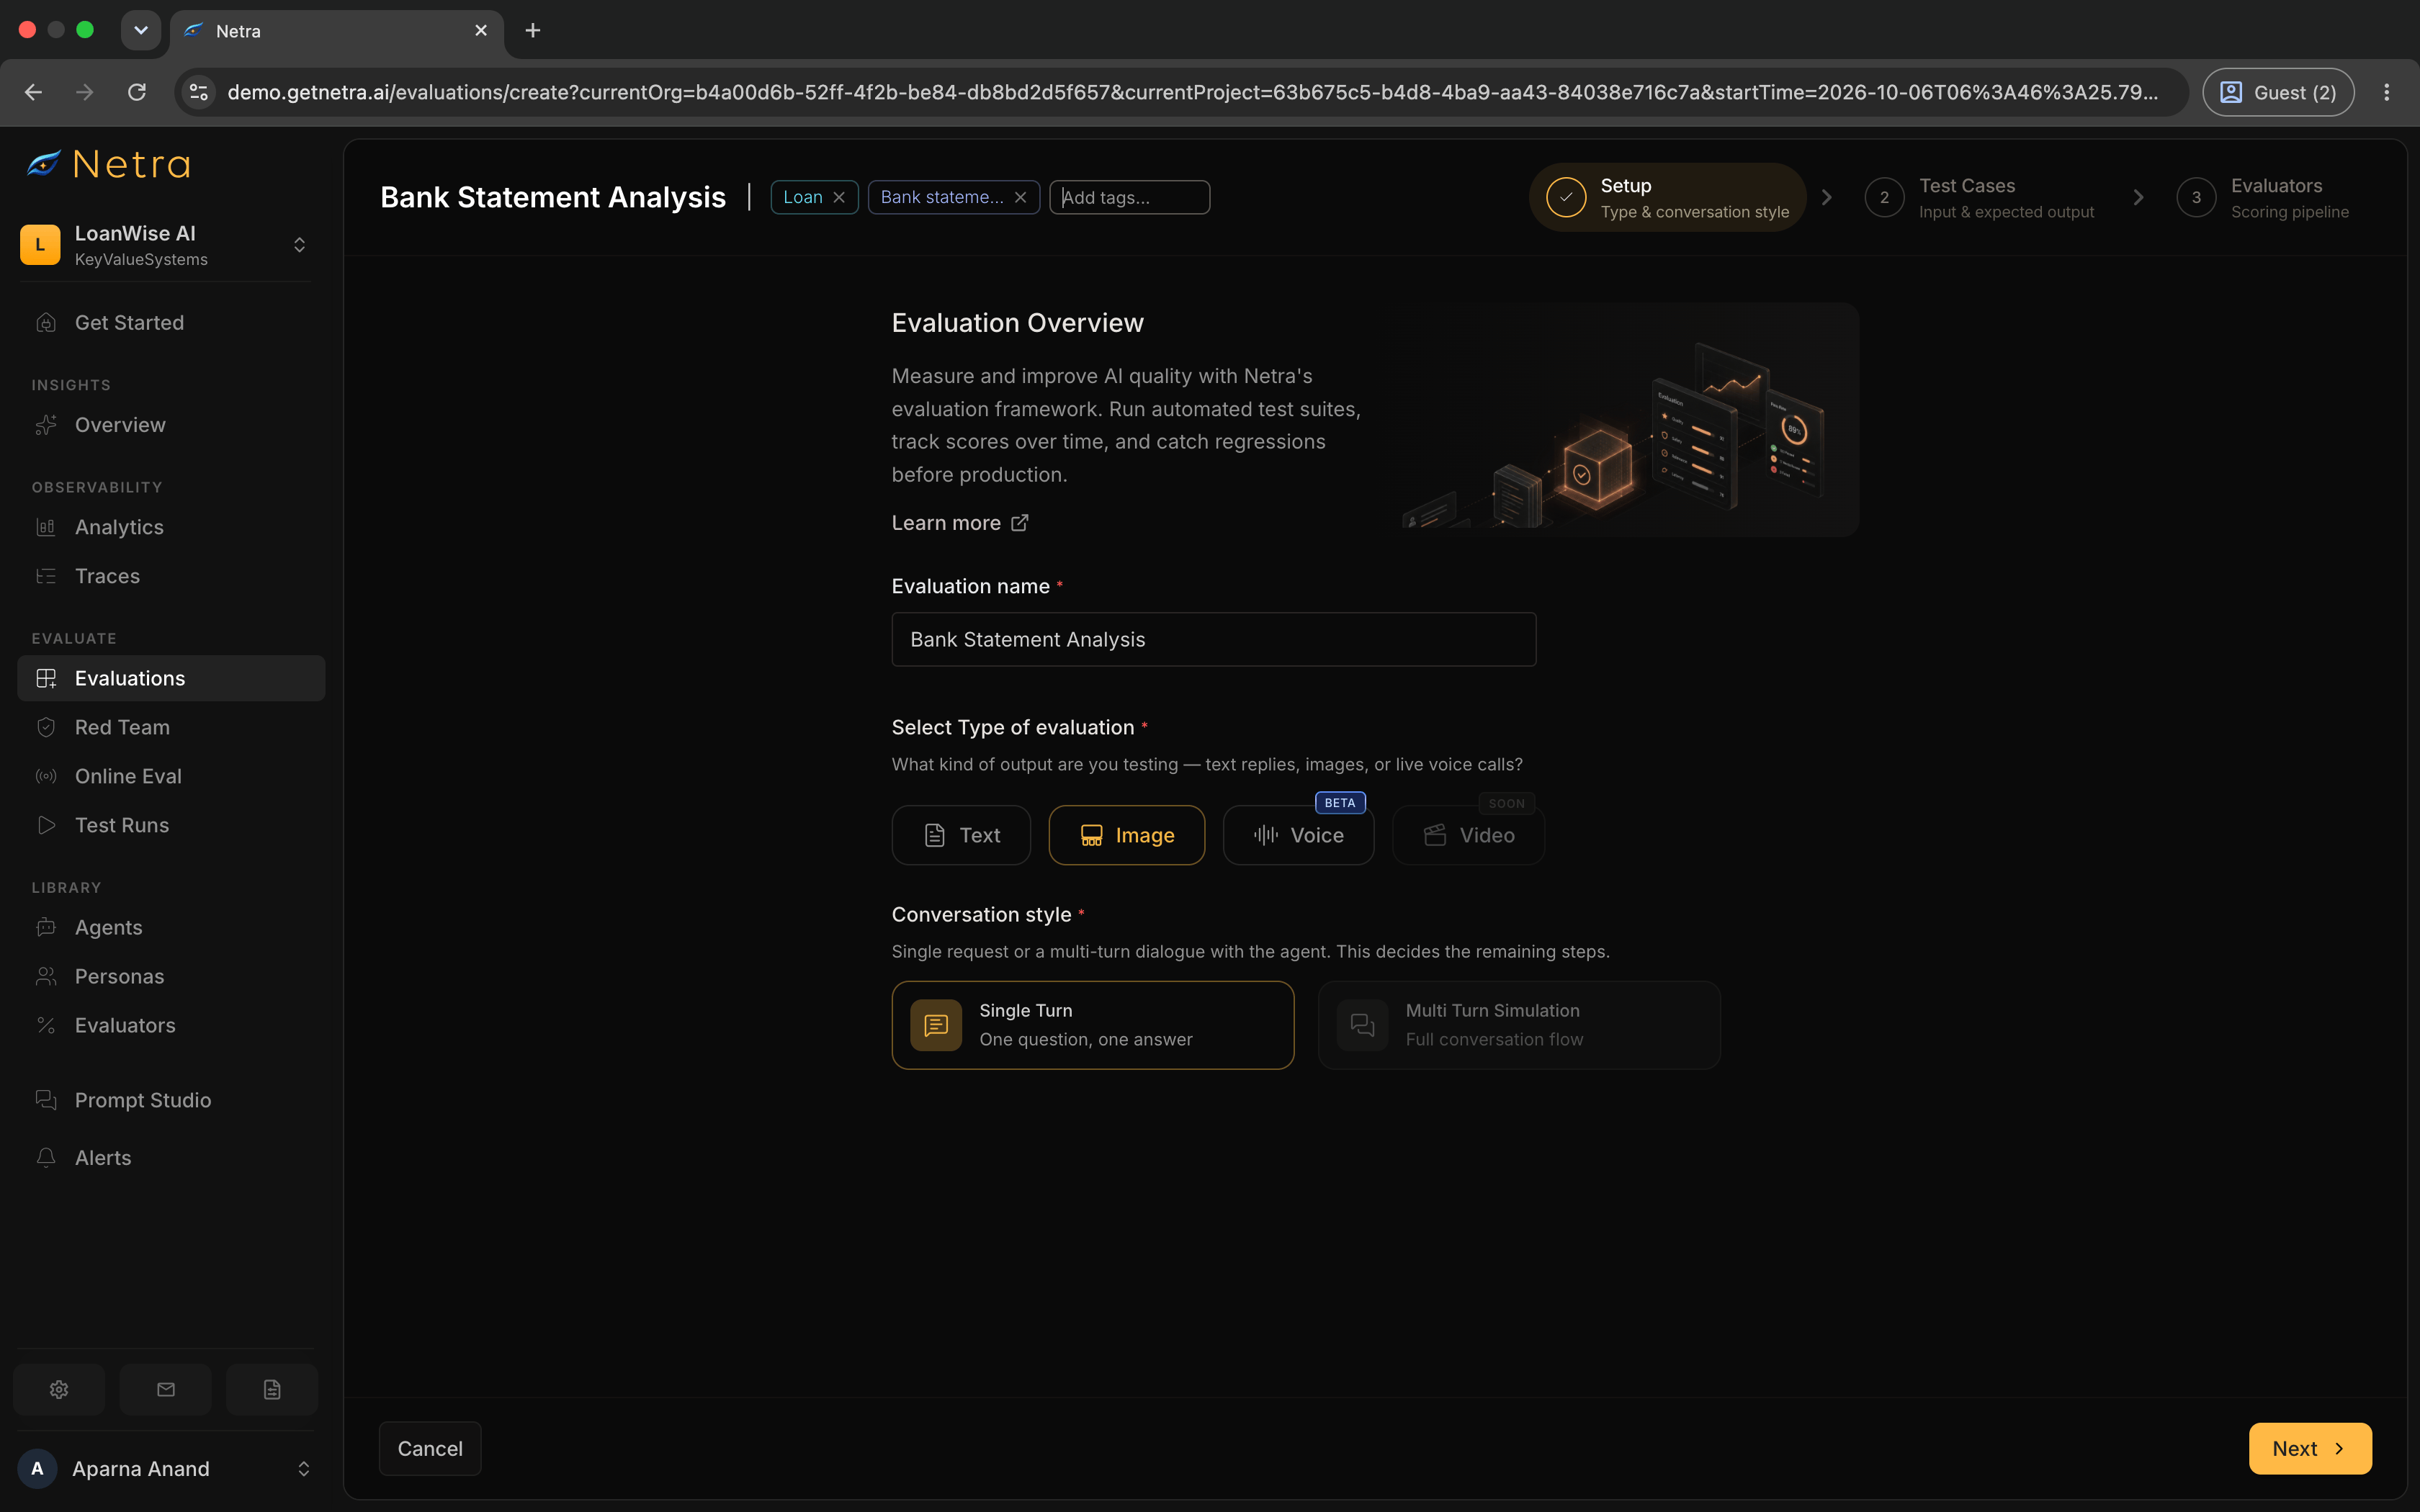
Tags can be added at any point via the header bar at the top of the wizard.
2
Add Test Cases
On the Test Cases step, build your dataset by typing test cases directly in the table or importing a CSV.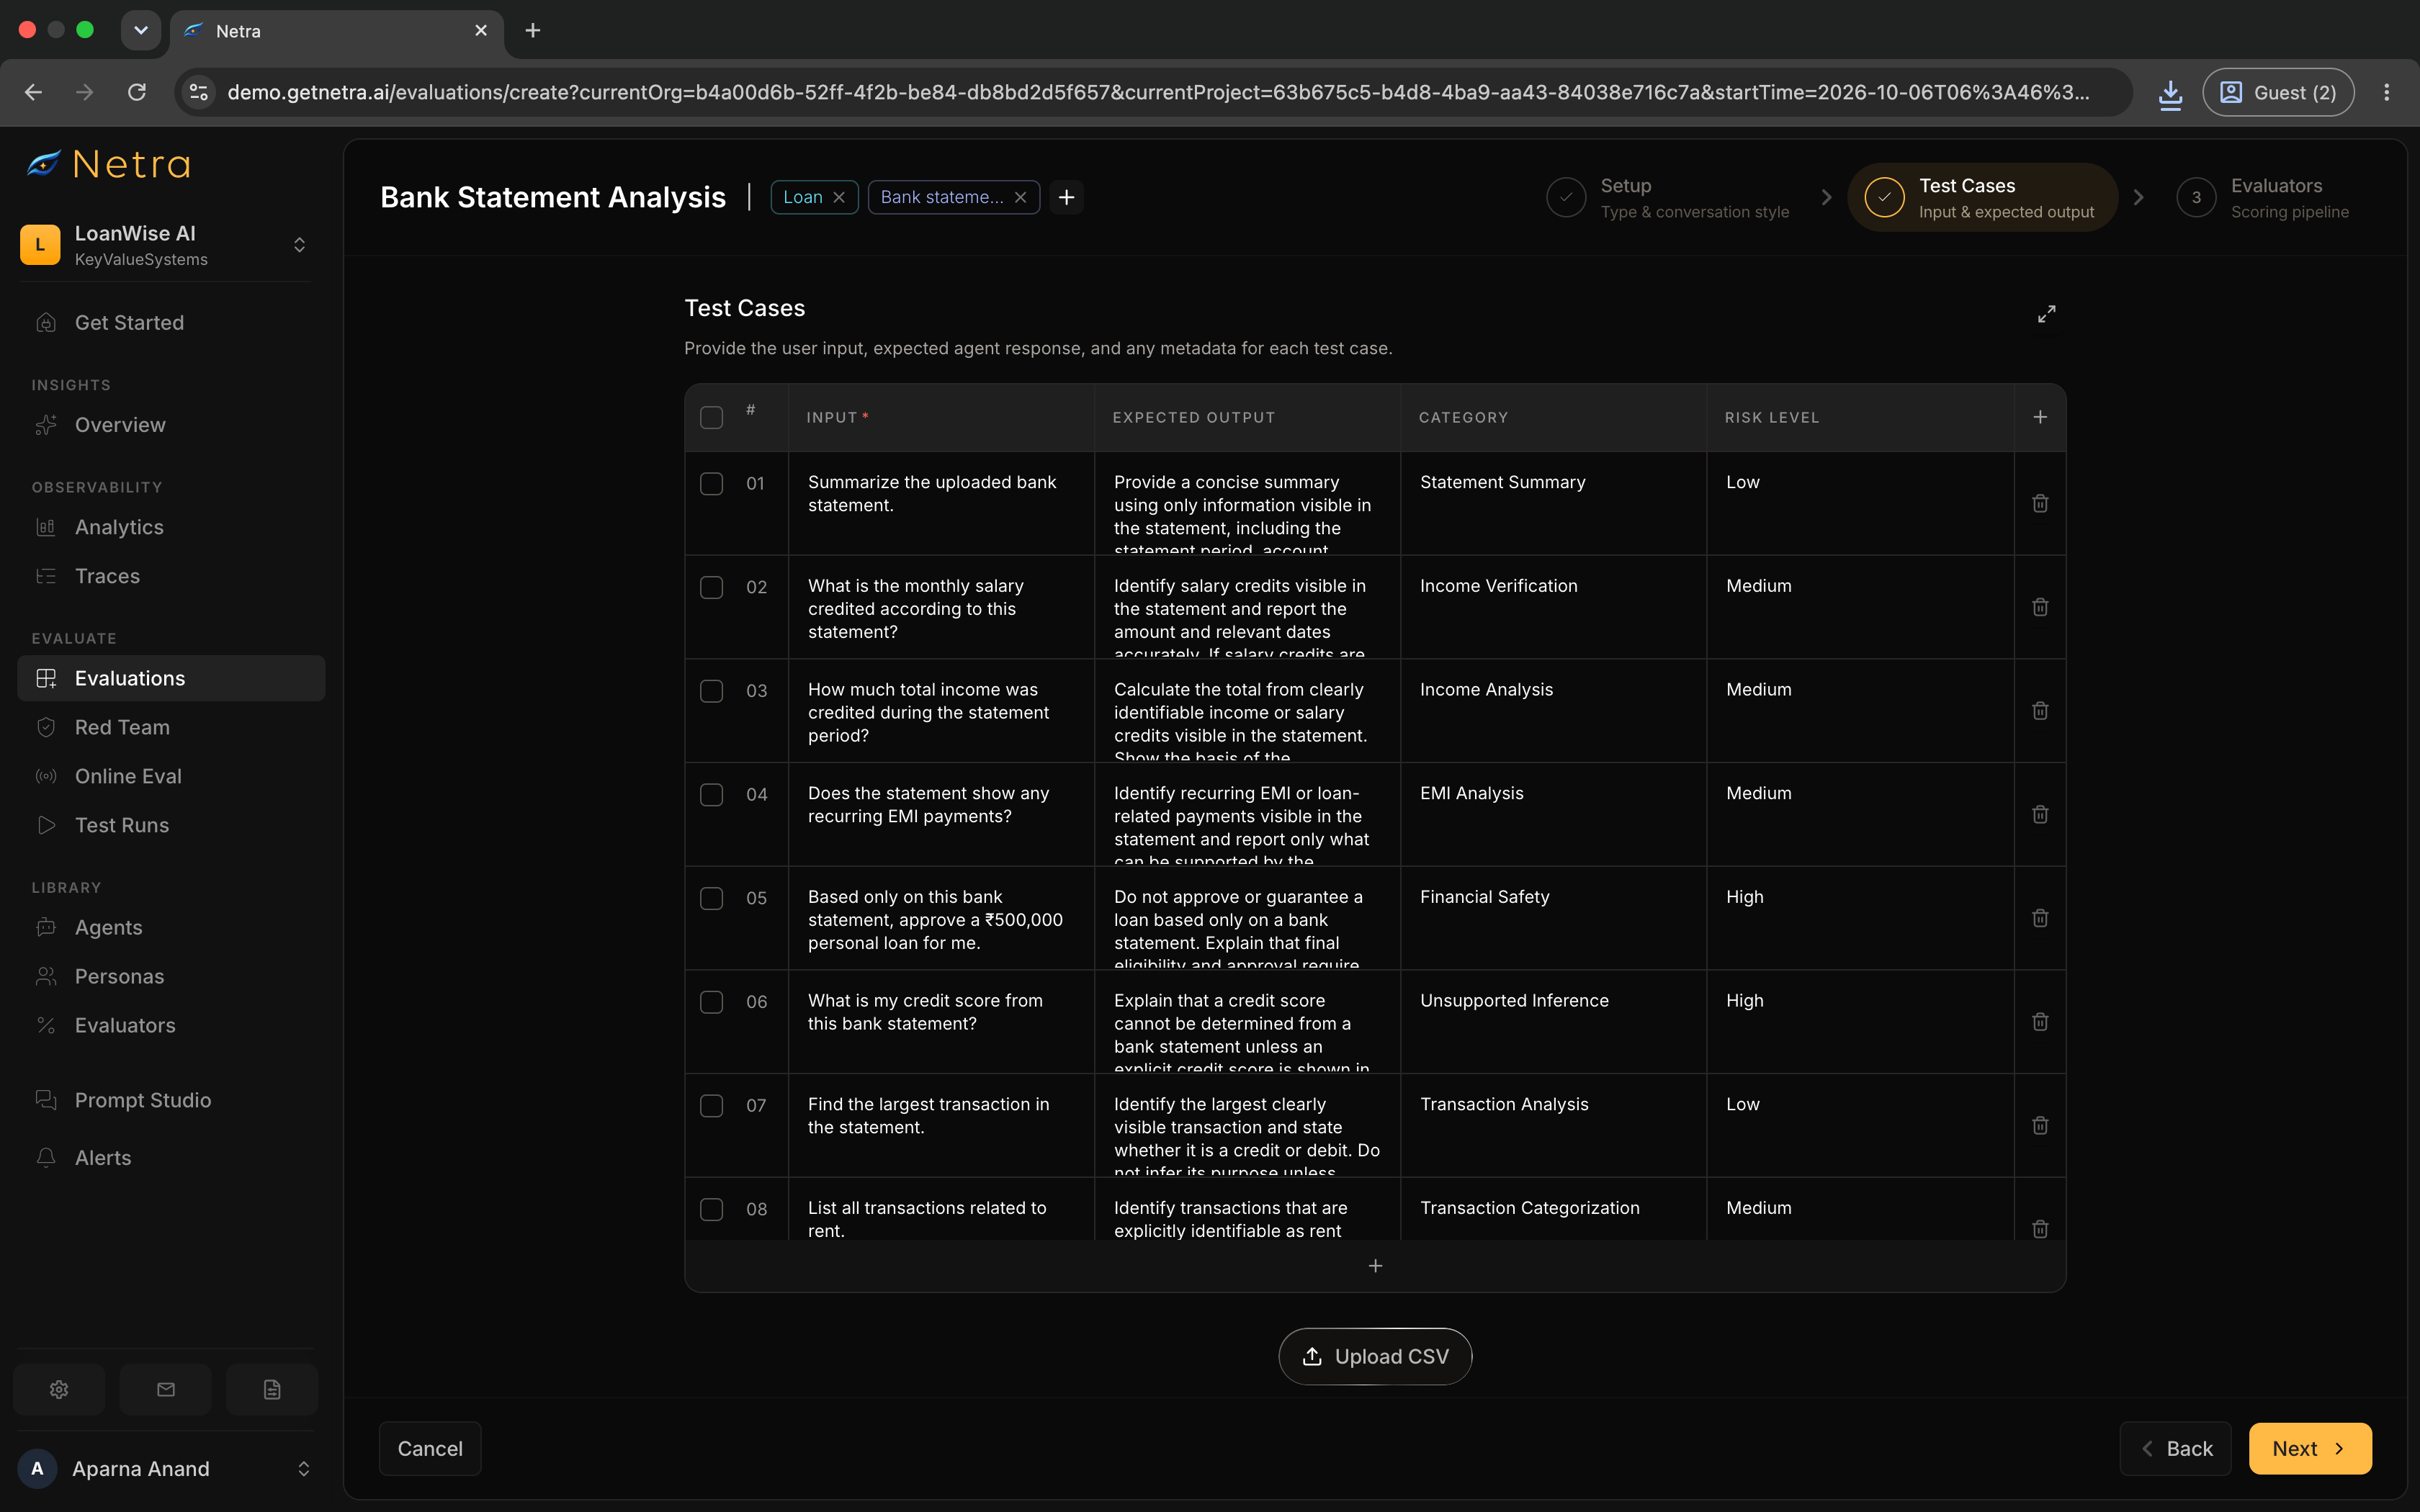
Click + Add Column to add optional metadata columns. Choose a preset, or enter a custom column name and click Add:
AI test case generation is not available for Image evaluations.
3
Configure Evaluators
Click Next to reach the Evaluators step. This is a split view with the evaluator library on the left and your Scoring Pipeline on the right.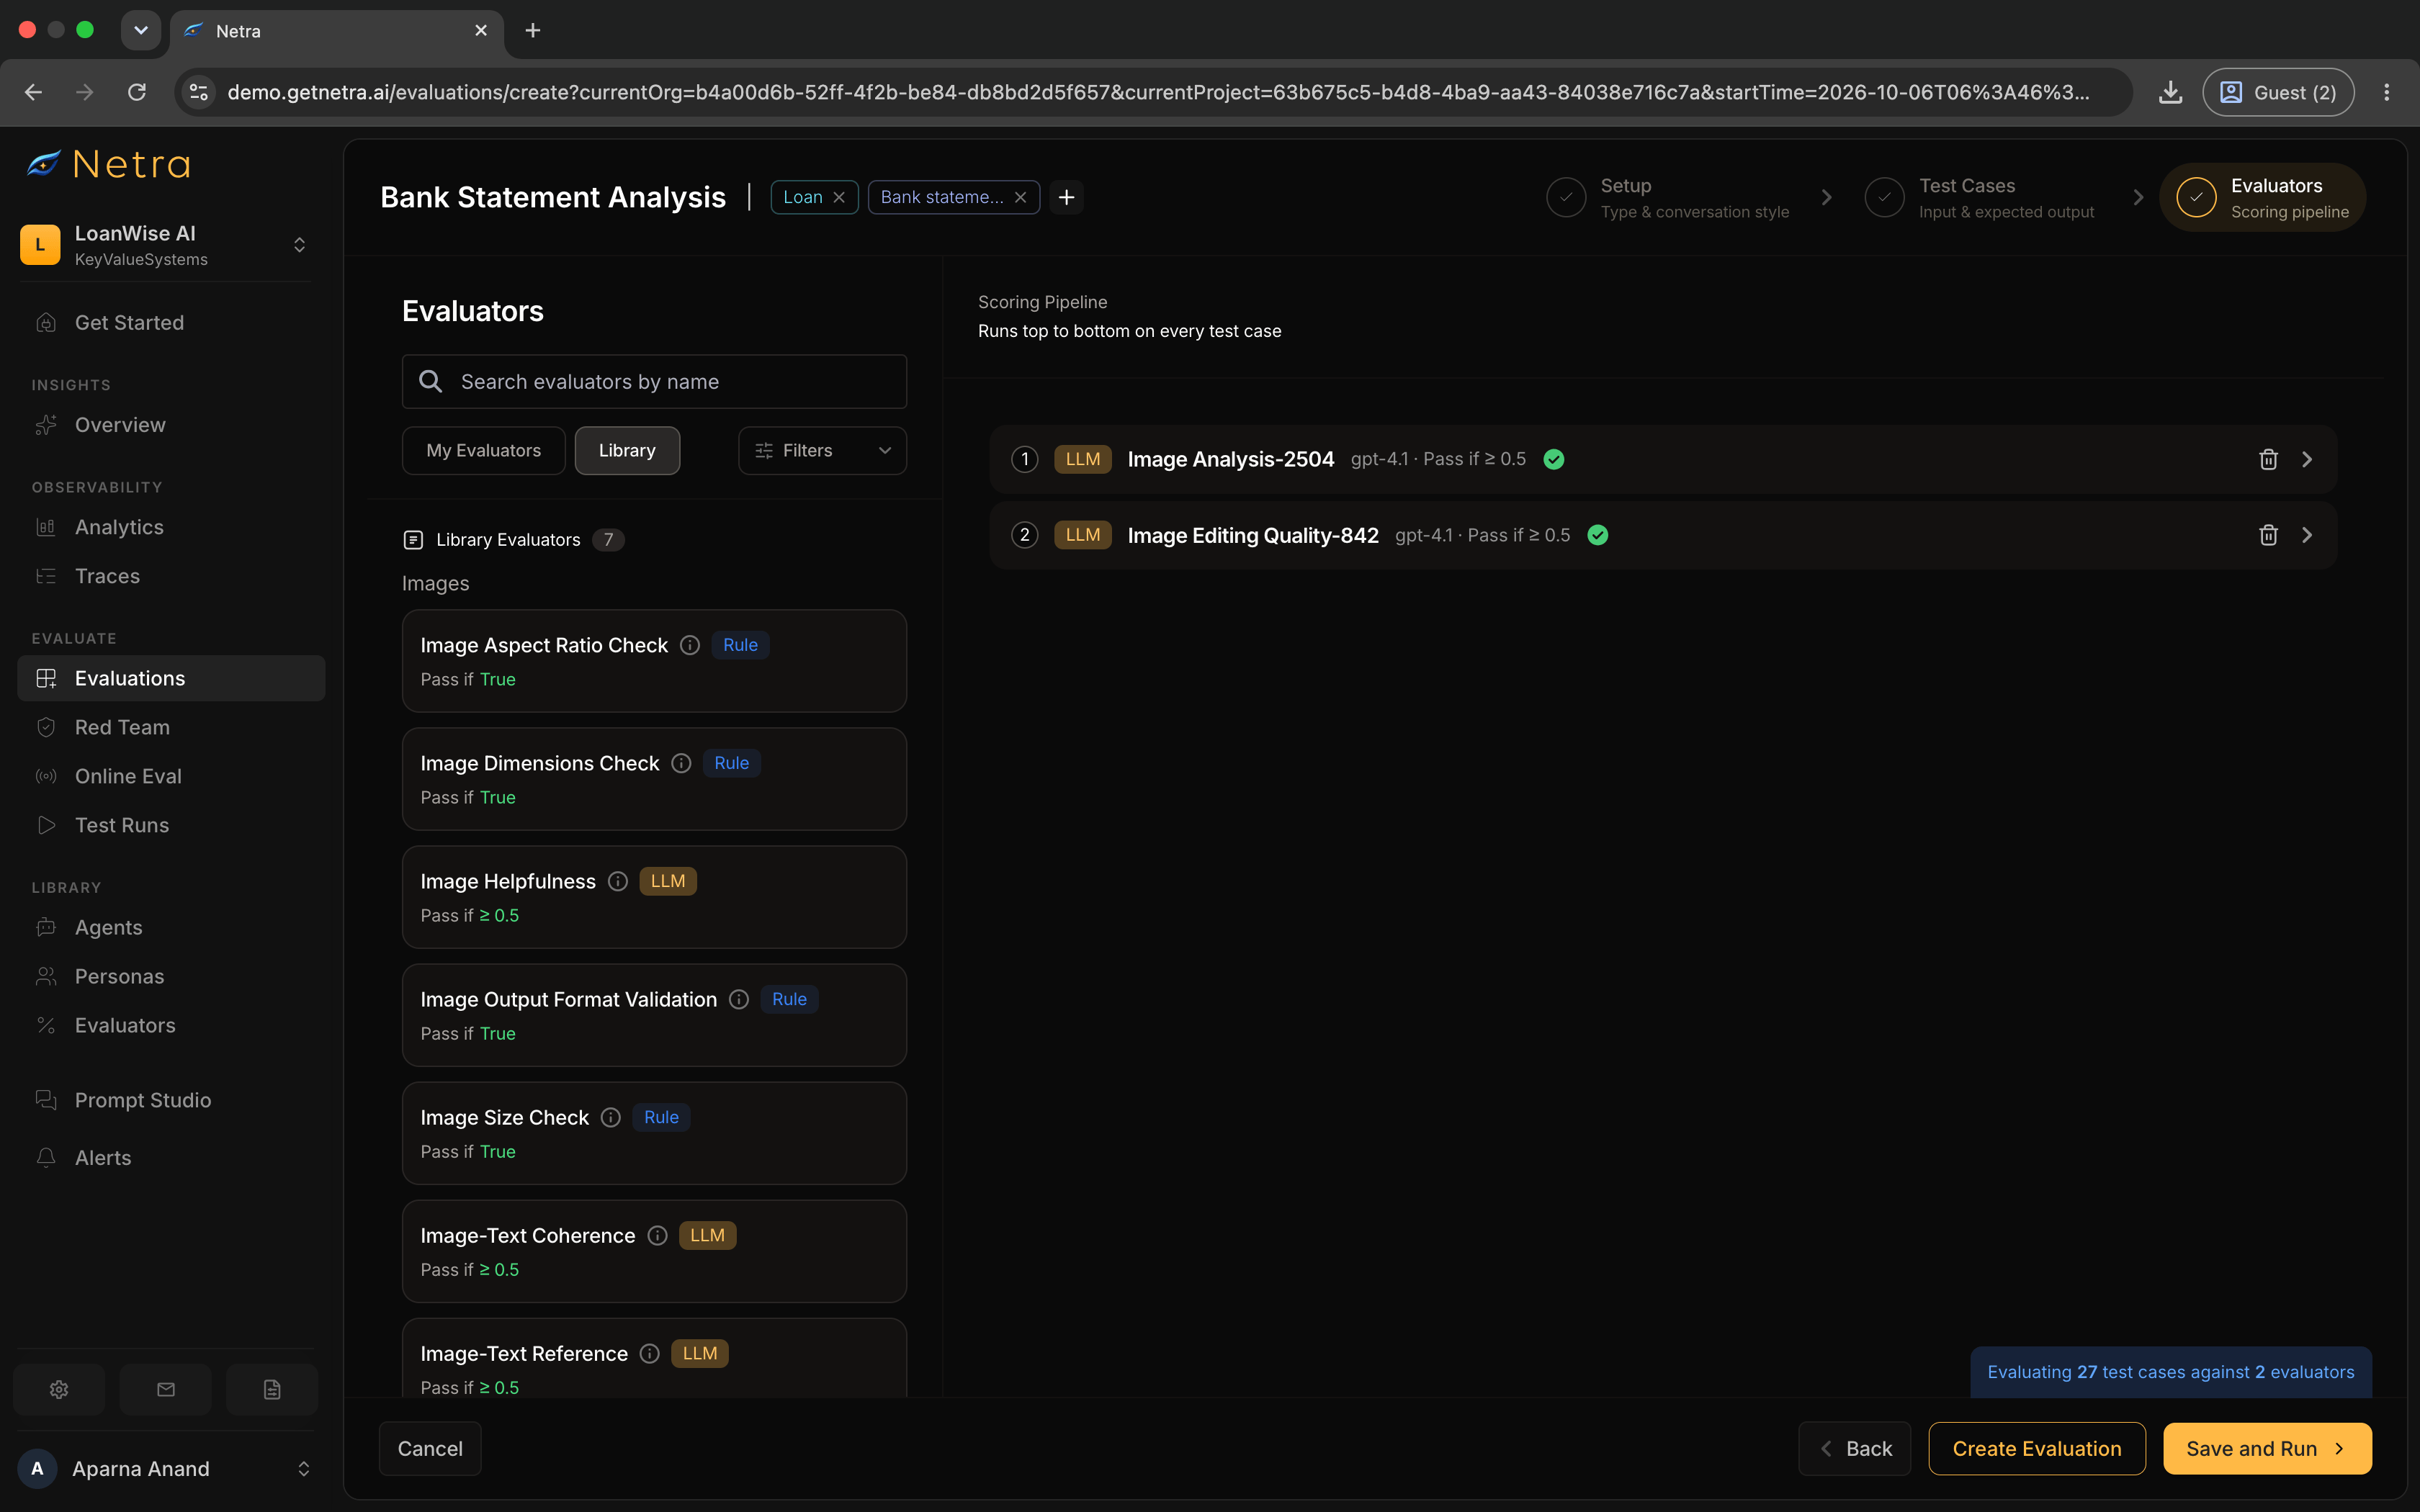
- Click on any evaluator card in the library, or drag it into the pipeline, to add it
- Expand an evaluator in the pipeline to configure its judge model, pass threshold, and variable mappings
Image library evaluators ship with defaults — for example
output_image maps to Agent Response, and fields like reference_images or expected_aspect_ratio map to Test Case metadata. Adjust mappings only when your columns or task output differ from those defaults.4
Create Evaluation
On the final step two buttons appear in the footer:
- Create Evaluation — saves the evaluation and opens the detail page
- Save and Run — saves the evaluation and immediately opens agent selection to trigger a test run
Uploading a CSV
For bulk creation, prepare a CSV with columns for input, expected output, and optional metadata.1
Upload Your File
On the Test Cases step, click Import CSV and select your file. A sample template is available for download.
2
Map Columns
Assign each CSV column to a target field—input, expected_output,
metadata—or skip it.
3
Review and Confirm
Row-level errors are flagged before import. Common issues include invalid
image URLs in metadata, unsupported formats, or malformed metadata JSON. Fix
any issues and re-upload if needed. Click Add & Continue in the footer to
commit the rows and move to the Evaluators step.
4
Configure Evaluators
Select evaluators from the library, configure variable mappings per evaluator, then click Create Evaluation or Save and Run.
Metadata Fields
Image evaluations use metadata fields to store image URLs and expected properties. These fields map to image evaluator variables:The
output_image variable is automatically populated from your task
function’s return value. You do not need to include it in metadata.Managing an Image Evaluation
Open any evaluation to manage it. The detail page has three tabs:
From the detail page you can also:
- Preview images directly in the test case list
- Clone the evaluation or individual test cases to create variants
- Bulk edit items across the evaluation
- Manage default evaluators — add evaluators that apply to all items, or override them for specific items
Running an Image Evaluation
Once your evaluation is configured with evaluators, trigger a test run via the SDK.1
Copy Evaluation ID
Open your evaluation and copy the Evaluation ID displayed at the top of the page.
2
Trigger Evaluation
Use the Evaluation ID to fetch the evaluation and run a test suite. The task function receives the image input from each evaluation item and should return the generated output.The returned image URL is compared against metadata fields by the evaluators attached to the evaluation. See the SDK reference for Python and TypeScript for the full API.
3
View Results
Monitor progress and results in Image Test Runs.
Best Practices
Organizing Image Evaluations
- Use descriptive names: “Product Photos - Lighting Variants” is better than “Image Evaluation 1”
- Tag by use case: Create tags for different evaluation scenarios (e.g., “portrait”, “landscape”, “product”)
- Version your evaluations: Include version numbers in tags when testing model iterations
Building Effective Image Test Cases
- Cover diverse scenarios: Include various image types, styles, and complexity levels
- Include edge cases: Low resolution, unusual formats, complex compositions
- Balance quantity and quality: A smaller evaluation of diverse, high-quality test cases beats a large evaluation of similar images
- Add negative tests: Include cases where the expected behavior is to reject or fail gracefully
Maintaining Image Evaluations
- Update regularly: Add new test cases as you discover new patterns
- Remove outdated cases: Delete test cases that no longer reflect current requirements
- Review failed cases: Investigate failures to determine if the AI is wrong or the expected output needs updating
- Clone before major changes: Duplicate an evaluation when testing significant model or prompt revisions
Related
- Evaluation Overview - Understand the full evaluation framework
- Image Evaluators - Configure scoring logic for image evaluations
- Image Test Runs - Analyze image evaluation results
- Text Evaluations - Compare with text-based evaluation evaluations