Why Agents Matter
Testing AI agents manually doesn’t scale. Connecting your agent to Netra unlocks automated, repeatable evaluation:How It Works
Netra provides two ways to interact with your connected agent:Playground
Send individual messages to your agent in an interactive chat. Ideal for quick validation while configuring endpoints and response mappings.
Test Suite Run
Trigger a full dataset evaluation against your agent. Netra fans out every dataset item, collects responses, runs evaluators, and reports results.
Agents Dashboard
Navigate to Simulation → Agents from the left navigation panel. The dashboard displays all configured agents for the current project.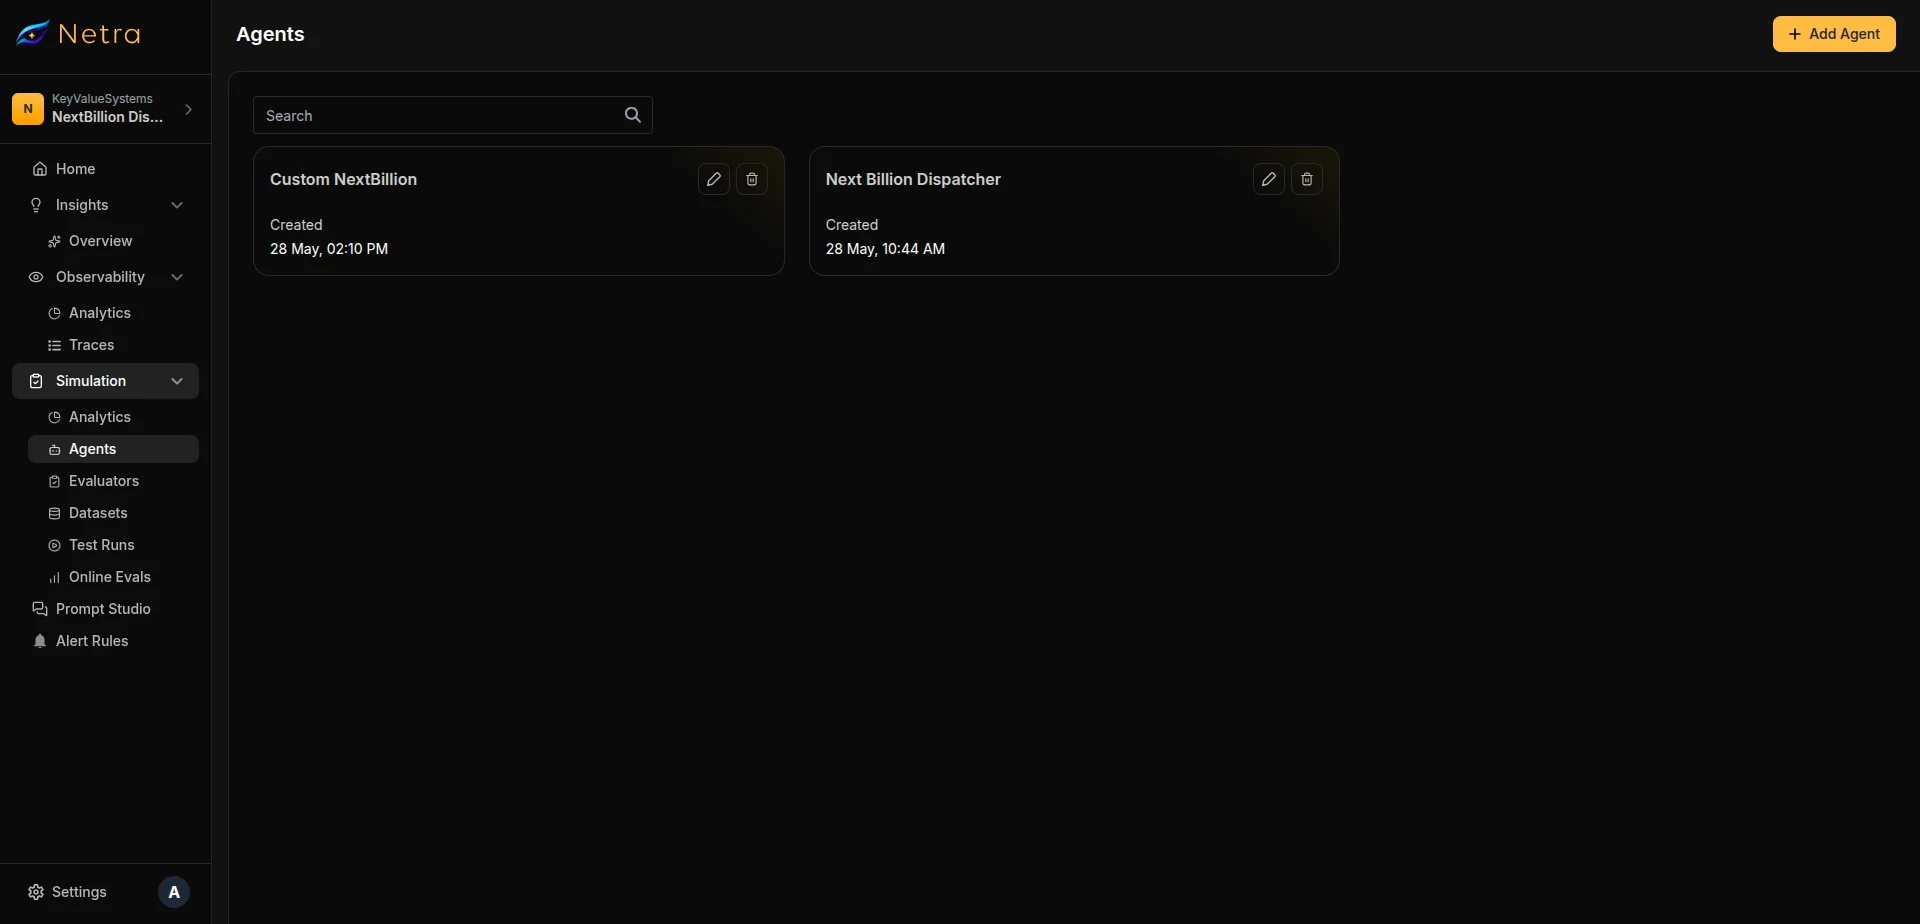
Configuring an Agent
Click Add Agent in the top right corner to configure a new agent connection.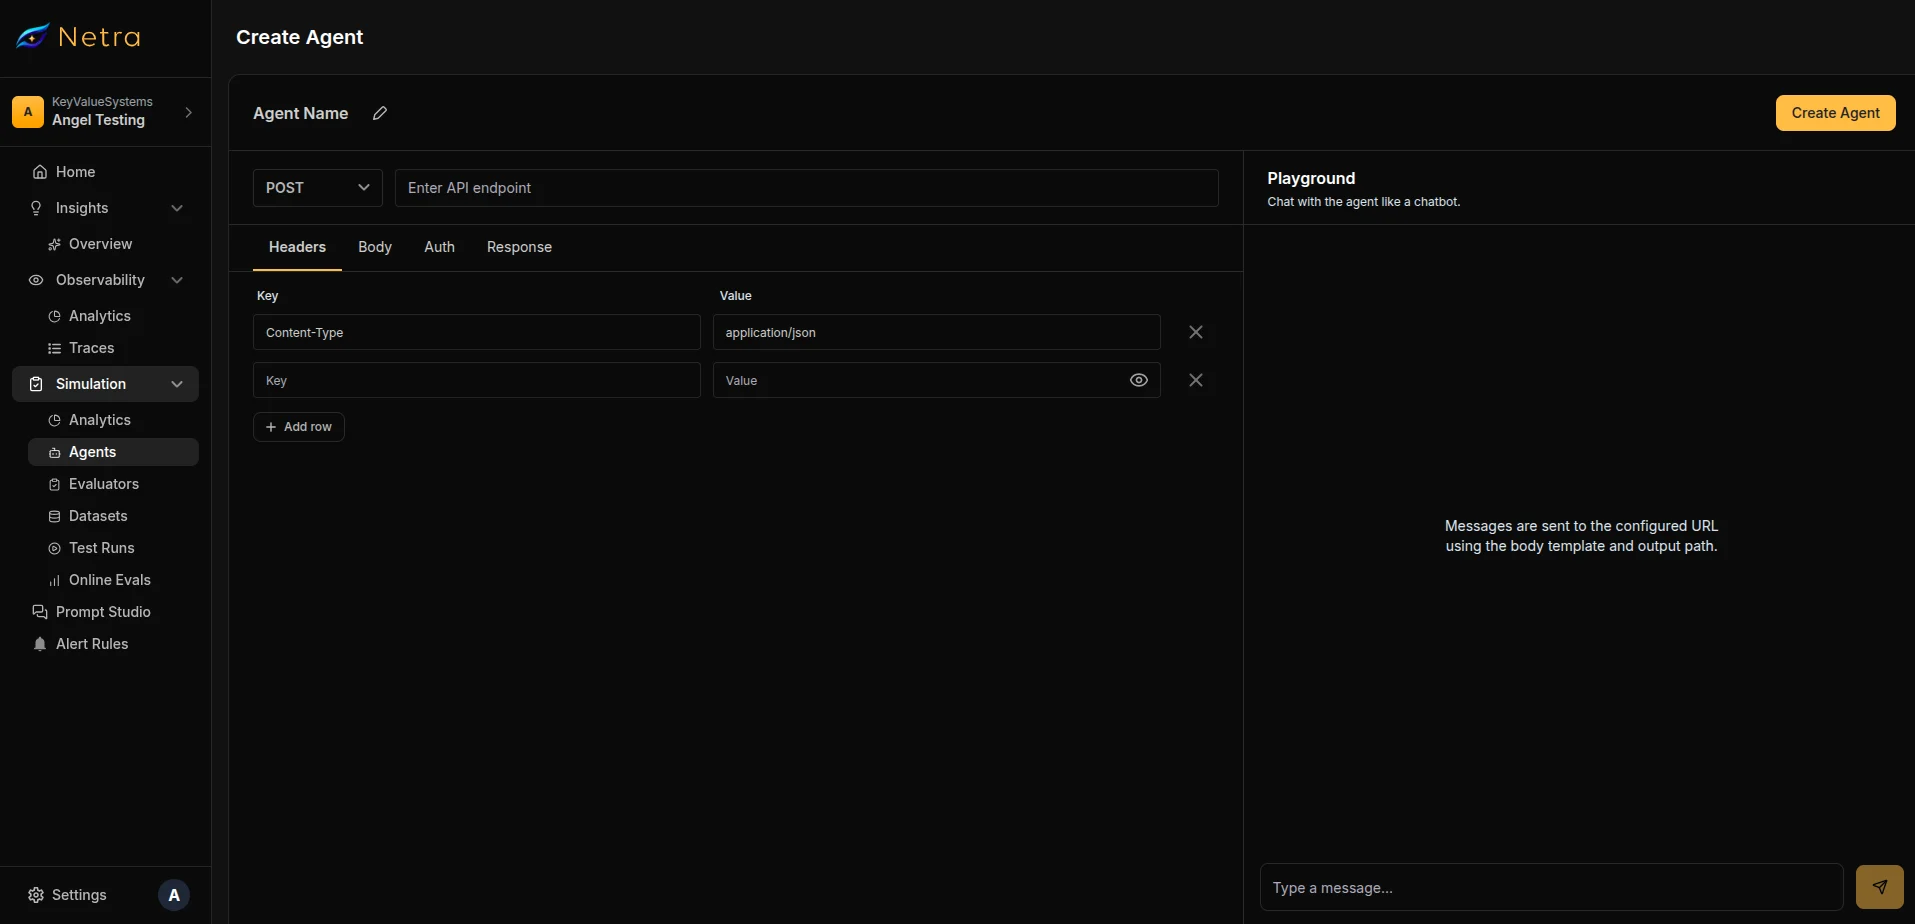
1
Name Your Agent
Enter a descriptive name (e.g., “Customer Support Bot - Staging”). This name identifies the agent when selecting it for test suite runs.
2
Set HTTP Method & Base URL
Choose the HTTP method and enter your agent’s endpoint URL.
3
Configure Headers
Add any custom headers your agent requires. A
Content-Type: application/json header is included by default.Headers that contain sensitive values (API keys, tokens) are encrypted at rest and masked when viewed by project members.
4
Set Authentication
Choose your authentication method:
5
Define Request Body
Write a JSON body template using variable placeholders. Netra replaces these with actual values at runtime.Default template:
6
Map Response Fields
Tell Netra where to find the agent’s response in the JSON output using JSONPath expressions.
The text path must start with
$. and point to the field containing the agent’s response text.7
Save
Click Create Agent to save the configuration. The agent becomes available for test suite runs and appears on the Agents dashboard.
Testing in the Playground
The Playground is an interactive chat panel on the right side of the agent configuration page. Use it to validate your endpoint configuration before running full evaluations.Sending Messages
- Type a message in the input field at the bottom of the Playground panel
- Press Enter or click the send button
- Netra constructs the HTTP request using your configuration, calls your agent, and displays the response
What Happens Behind the Scenes
When you send a playground message:- Netra resolves your body template: replacing
{{userMessage}}with your input and{{sessionId}}with the current session - An async job is created and your agent’s endpoint is called via HTTP
- The response is parsed using your configured Text Path to extract the reply
- If a Session Path is configured, the session ID is stored for subsequent messages in the same conversation
Multi-Turn Conversations
The Playground maintains conversation context through sessions. Each message in the same Playground session includes thesessionId from the previous response, enabling multi-turn conversations with stateful agents.
Click New Chat to reset the session and start a fresh conversation.
Validation runs before each message is sent. The agent name, base URL, and response text path are required. If the body template contains invalid JSON, you’ll see an error before the message is dispatched.
Triggering a Test Suite Run
This is the primary workflow for the Agent Trigger feature: running an entire Dataset against a configured agent from the UI.Prerequisites
Before triggering a run, ensure you have:- At least one Agent configured in the current project
- A Dataset with items (single-turn) or scenarios (multi-turn)
- Evaluators attached to the dataset for scoring
Starting a Run
1
Open Your Dataset
Navigate to Simulation → Datasets and open the dataset you want to evaluate.
2
Click Run
In the dataset detail page toolbar, click the Run button.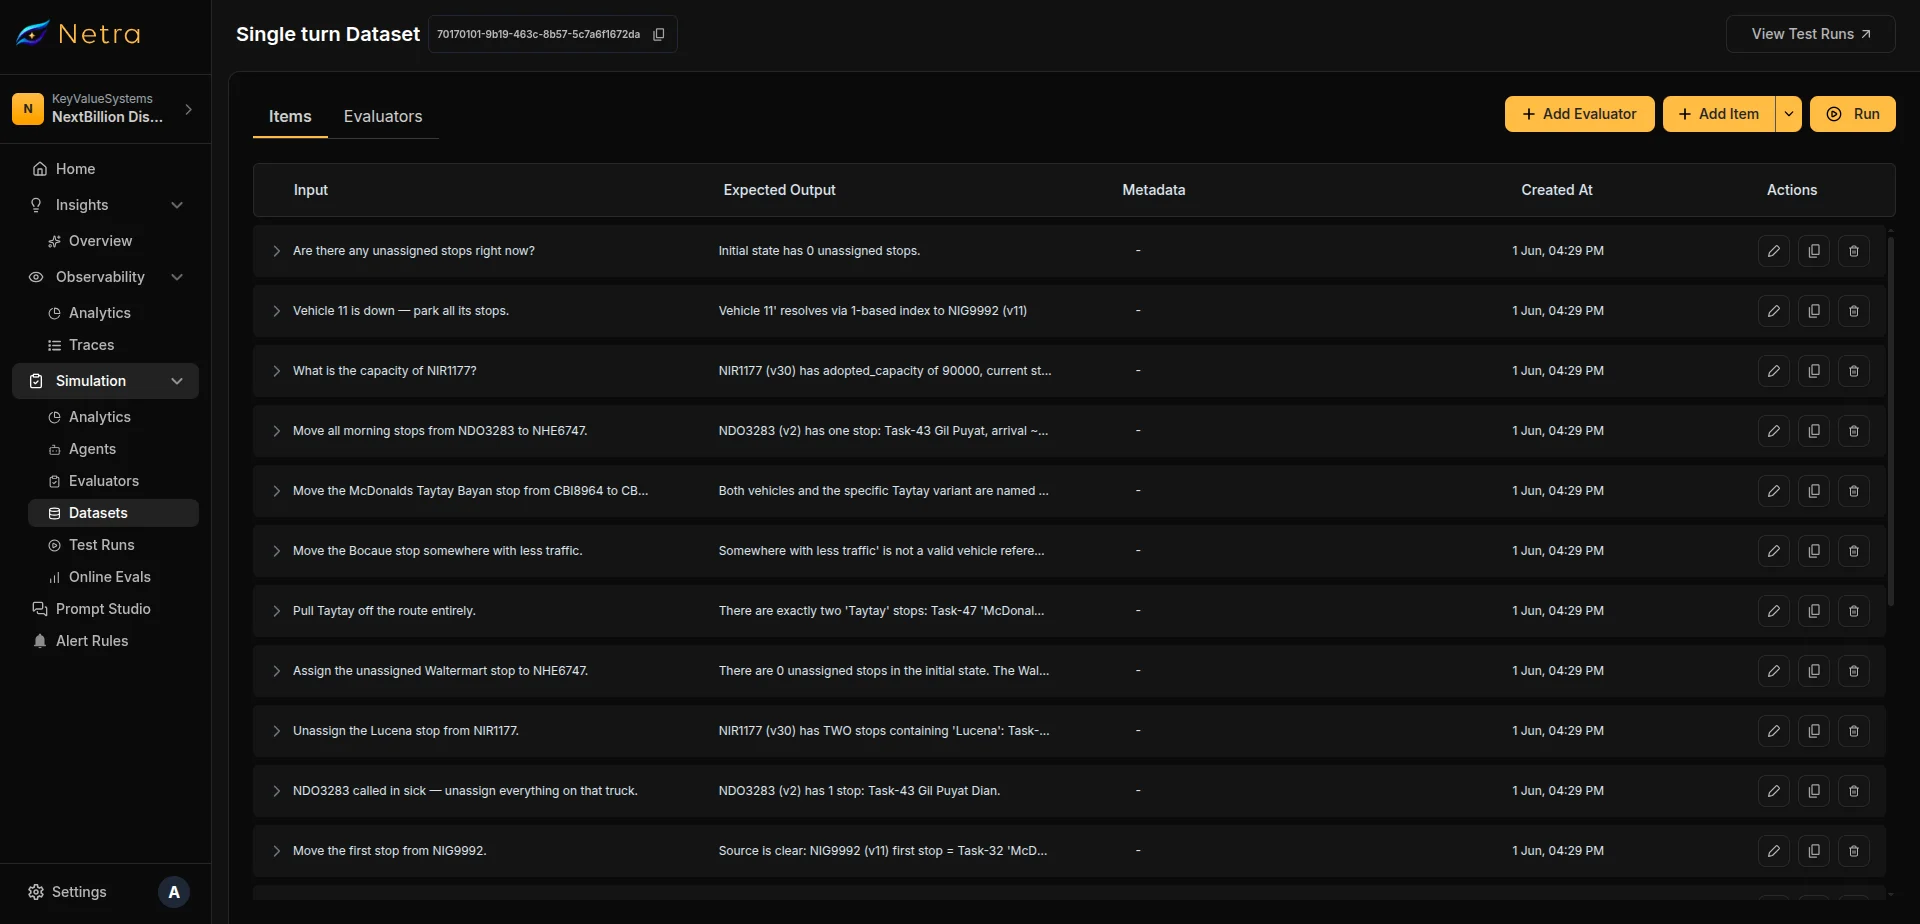
3
Configure the Run
The Run Test Suite modal appears with the following fields: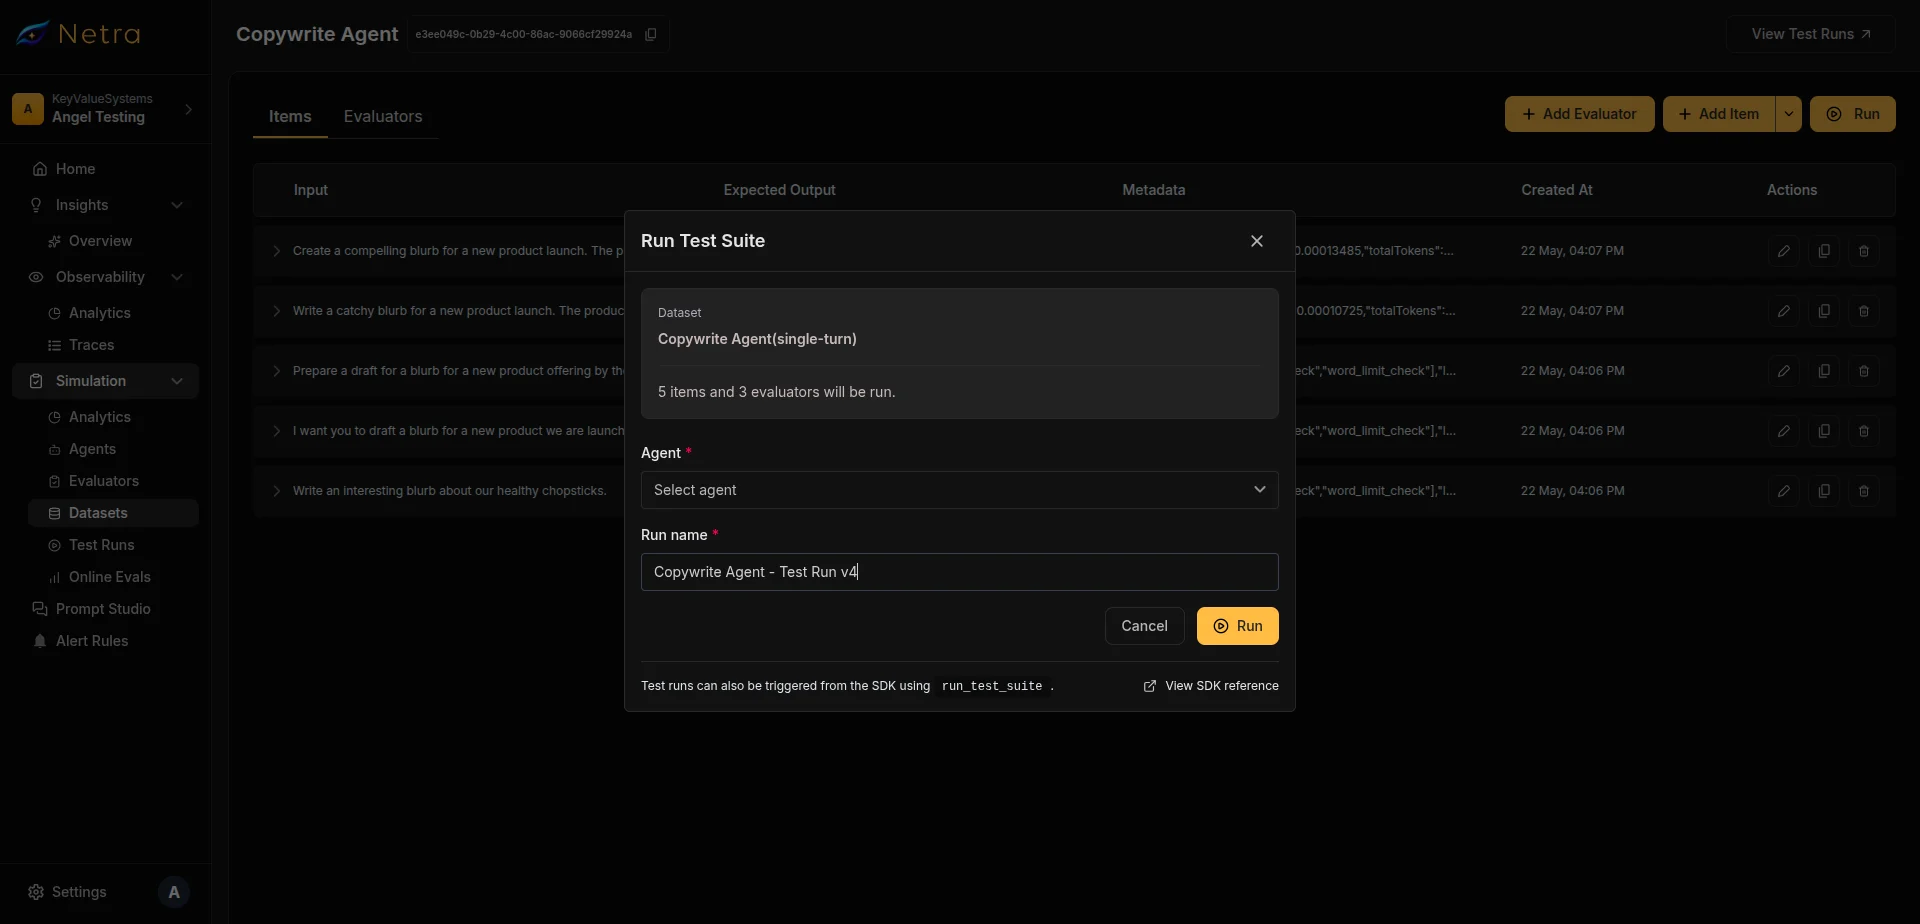
The modal also displays read-only context: dataset name, turn type (single or multi), record count, and evaluator count.
4
Confirm and Run
Click Run to trigger the test suite. On success, you are redirected to the Test Run detail page to monitor progress.
You can also trigger test suite runs programmatically using the SDK—call
run_test_suite for single-turn datasets or run_simulation for multi-turn datasets. See the SDK Reference for details.Monitoring Results
After triggering a run, you land on the Test Run detail page. The page updates as items complete.Status Summary
The summary card at the top shows aggregate metrics:
Use the refresh button to update the summary while the run is in progress.
Run Statuses
Per-Item Results
Each item in the results table shows:
Click any row to view detailed evaluation results, variable comparisons, or the full multi-turn conversation transcript.
Related
- Simulation Overview — Understand the full simulation framework
- Datasets — Create test cases to run against your agents
- Evaluators — Configure scoring logic for agent responses
- Test Runs — View detailed evaluation results and conversation transcripts
- Quick Start: Simulation — Get your first simulation running in minutes