> ## Documentation Index
> Fetch the complete documentation index at: https://docs.getnetra.ai/llms.txt
> Use this file to discover all available pages before exploring further.
# Organization Settings
> Manage your Netra organization settings, team members, projects, API keys, and billing. Control access and configure workspace-level preferences.
The Organization Settings page serves as the central hub for managing all aspects of your Netra organization. From here, you can control member access, project configurations, billing details, and provider integrations in one unified interface.
# General
Manage your organization's core identity and access:
* **Organization Name**: Edit your organization's display name
* **Organization ID**: View and copy your unique organization identifier
# Members
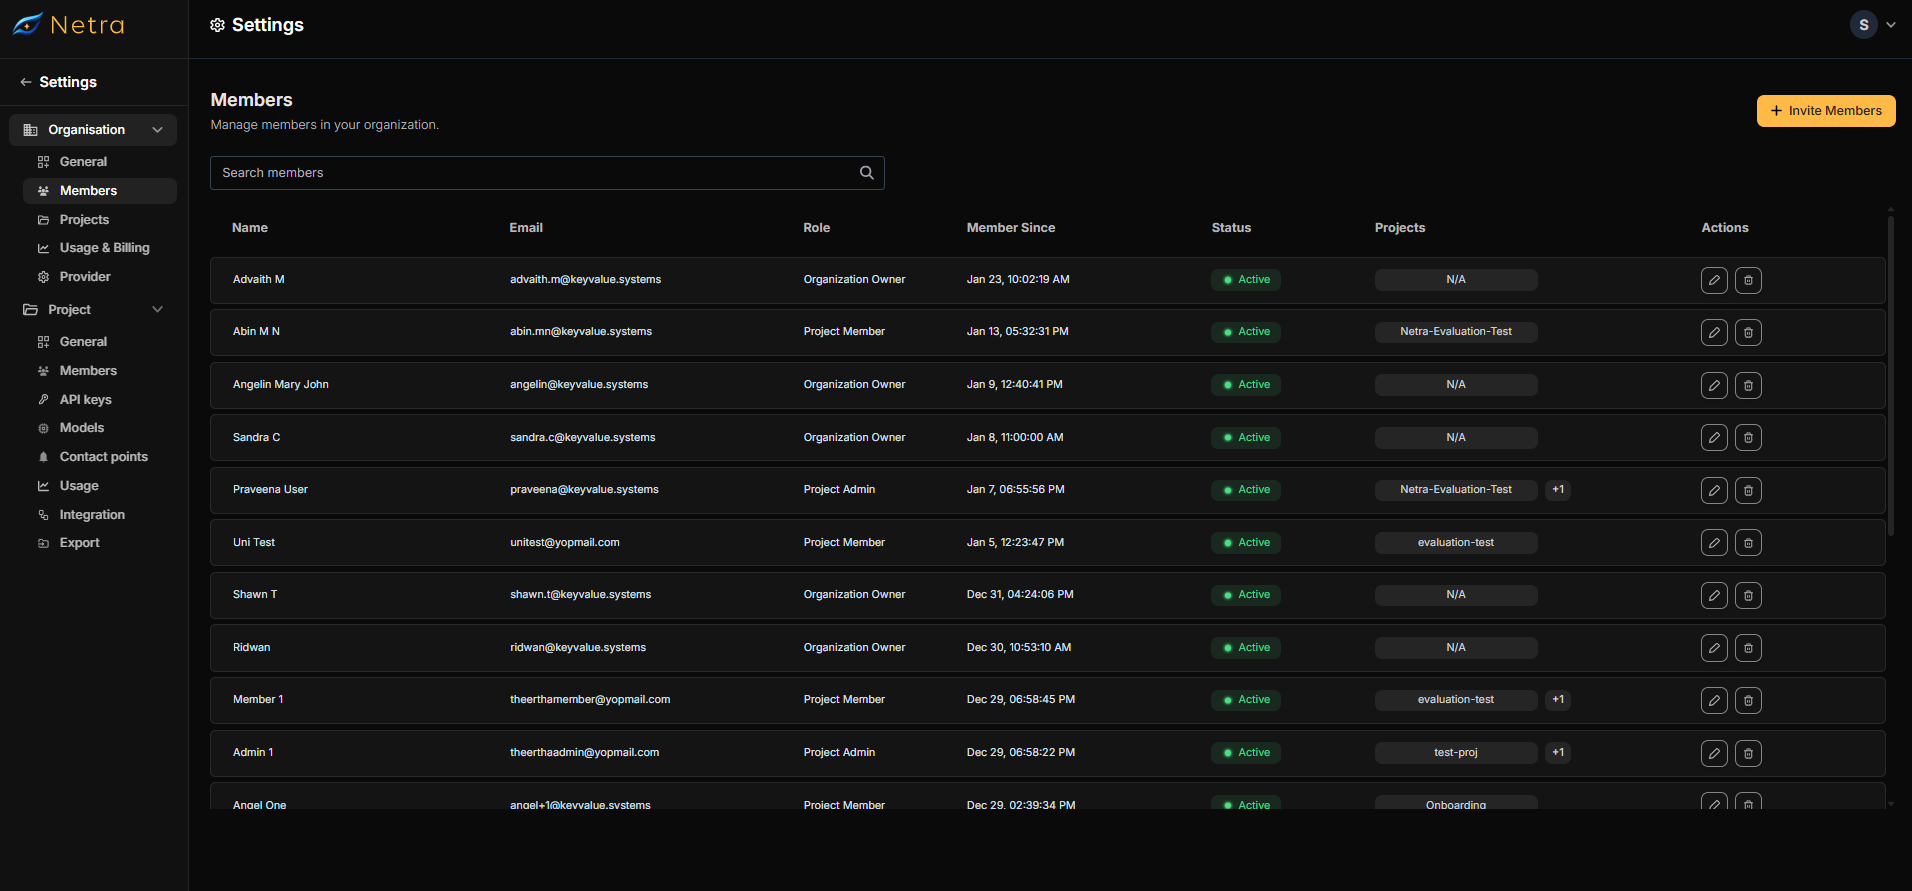 Manage organization members and their access levels:
* View all members with their details:
* Name and email
* Role within the organization
* Membership date
* Account status
* Project memberships
### Member Management
#### Editing Member Access
* To modify a member's permissions, click the edit icon next to their name in the members list. You can assign one of three roles:
* **Project Member**: Basic access to assigned projects with view and limited edit permissions
* **Project Admin**: Can manage project settings and members within their assigned projects
* **Organization Owner**: Full administrative access to all organization settings and projects
* You can also decide the projects the member has access to by selecting/deselecting the projects from the dropdown in the project section.
A member can be a part of multiple projects.
#### Inviting New Members
To add new team members:
Click the "Invite Members" button in the top-right corner.
In the invitation modal:
* Enter the email address of the person you want to invite. Enter multiple email addresses by pressing **Enter** after each address.
* Select their role from the dropdown menu
* Choose which projects they should have access to
Click "Send Invitation" to dispatch an email with joining instructions.
The invited member will receive an email with instructions to join your organization. You can track the status of pending invitations in the members list.
If you need to add multiple members to same project with same role, you can add all their email addresses together in the invitation modal.
# Projects
Manage organization members and their access levels:
* View all members with their details:
* Name and email
* Role within the organization
* Membership date
* Account status
* Project memberships
### Member Management
#### Editing Member Access
* To modify a member's permissions, click the edit icon next to their name in the members list. You can assign one of three roles:
* **Project Member**: Basic access to assigned projects with view and limited edit permissions
* **Project Admin**: Can manage project settings and members within their assigned projects
* **Organization Owner**: Full administrative access to all organization settings and projects
* You can also decide the projects the member has access to by selecting/deselecting the projects from the dropdown in the project section.
A member can be a part of multiple projects.
#### Inviting New Members
To add new team members:
Click the "Invite Members" button in the top-right corner.
In the invitation modal:
* Enter the email address of the person you want to invite. Enter multiple email addresses by pressing **Enter** after each address.
* Select their role from the dropdown menu
* Choose which projects they should have access to
Click "Send Invitation" to dispatch an email with joining instructions.
The invited member will receive an email with instructions to join your organization. You can track the status of pending invitations in the members list.
If you need to add multiple members to same project with same role, you can add all their email addresses together in the invitation modal.
# Projects
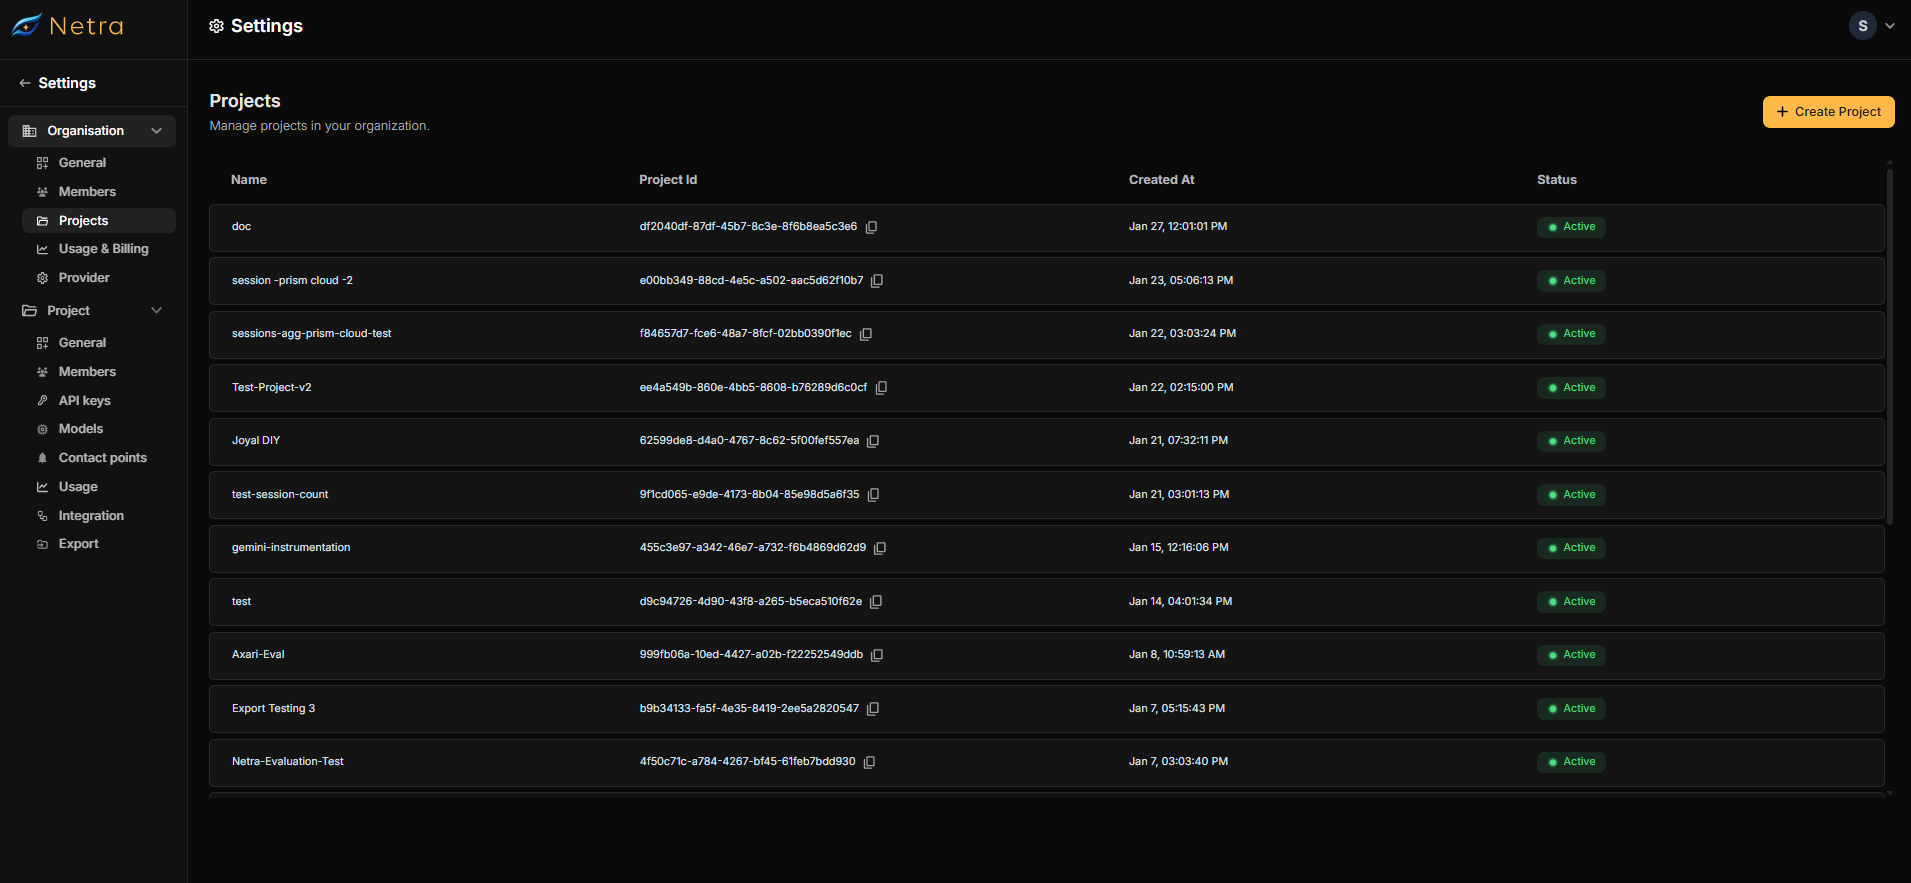 Manage all projects within your organization:
* View project details:
* Project name and ID
* Creation date
* Status (Active/Inactive)
### Project Management
* **Create New Project**:
* Enter project name
* Auto-generated project ID
Project names and IDs cannot be edited after creation. The project ID will be visible in the projects list after creation which can be copied for further use.
# Usage & Billing
Manage all projects within your organization:
* View project details:
* Project name and ID
* Creation date
* Status (Active/Inactive)
### Project Management
* **Create New Project**:
* Enter project name
* Auto-generated project ID
Project names and IDs cannot be edited after creation. The project ID will be visible in the projects list after creation which can be copied for further use.
# Usage & Billing
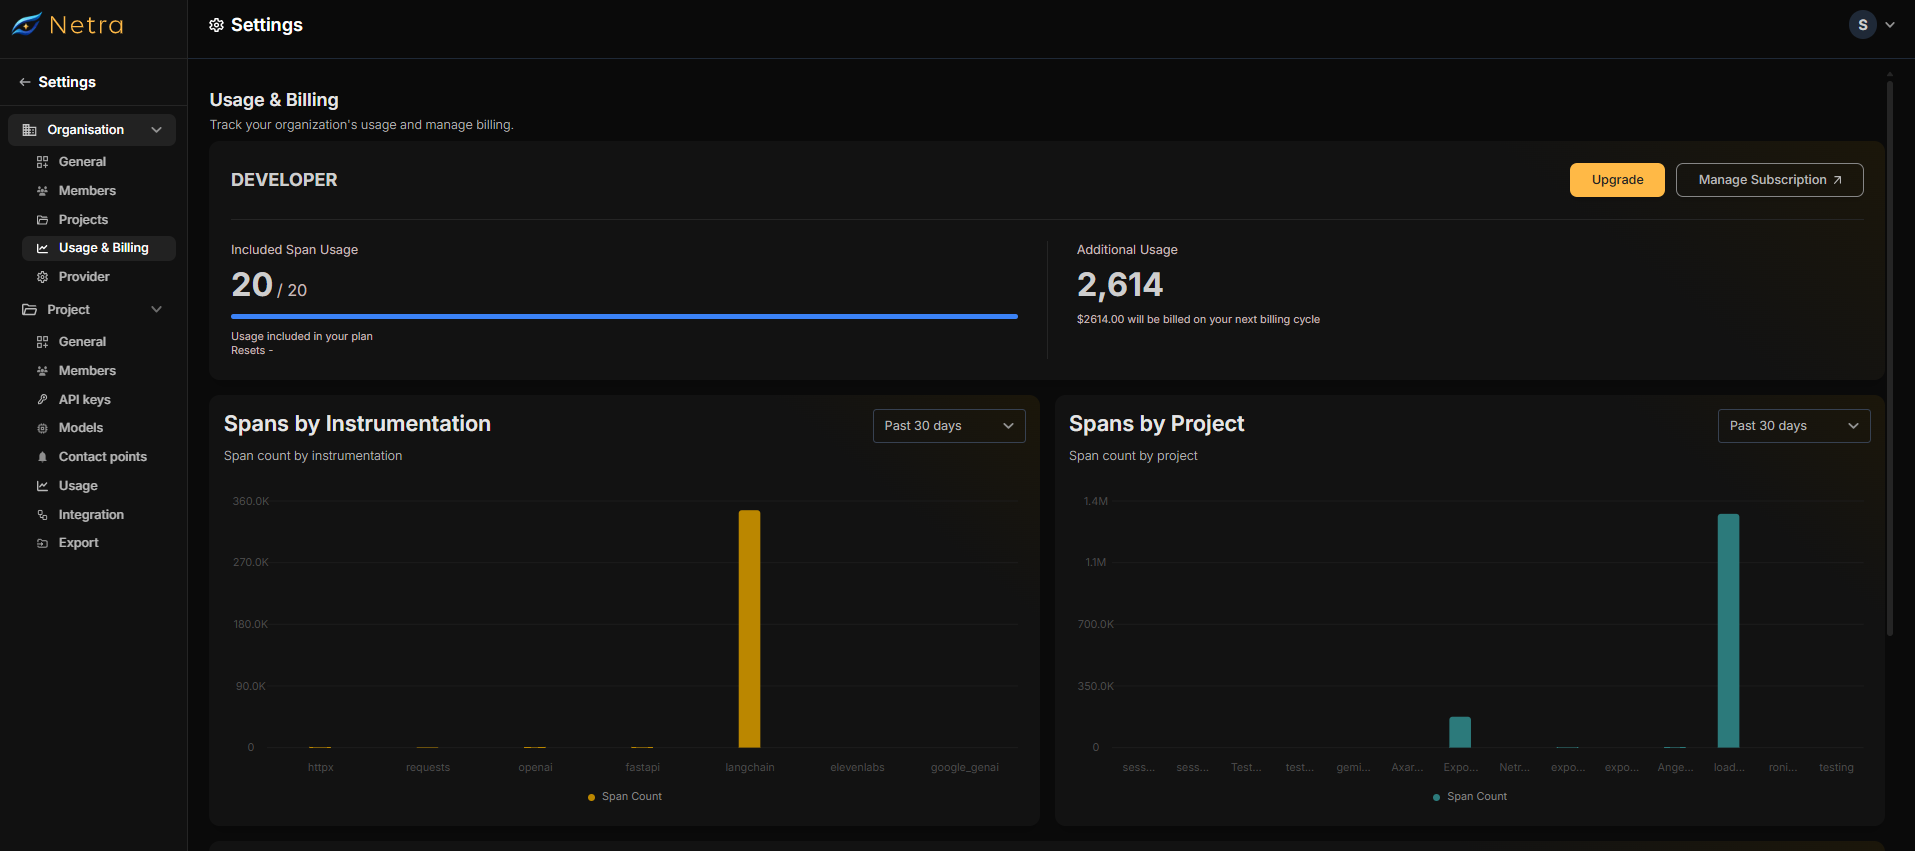 Track and manage your organization's resource usage and subscription:
* **Current Plan**: View your active plan (Developer/Enterprise)
* **Span Usage**: View your organization's span usage:
* Included in plan
* Total organization usage
* Additional usage costs
* **Usage Analytics**: View your organization's span usage analytics:
* Spans by instrumentation
* Spans by project
* Spans over time
# Provider
Track and manage your organization's resource usage and subscription:
* **Current Plan**: View your active plan (Developer/Enterprise)
* **Span Usage**: View your organization's span usage:
* Included in plan
* Total organization usage
* Additional usage costs
* **Usage Analytics**: View your organization's span usage analytics:
* Spans by instrumentation
* Spans by project
* Spans over time
# Provider
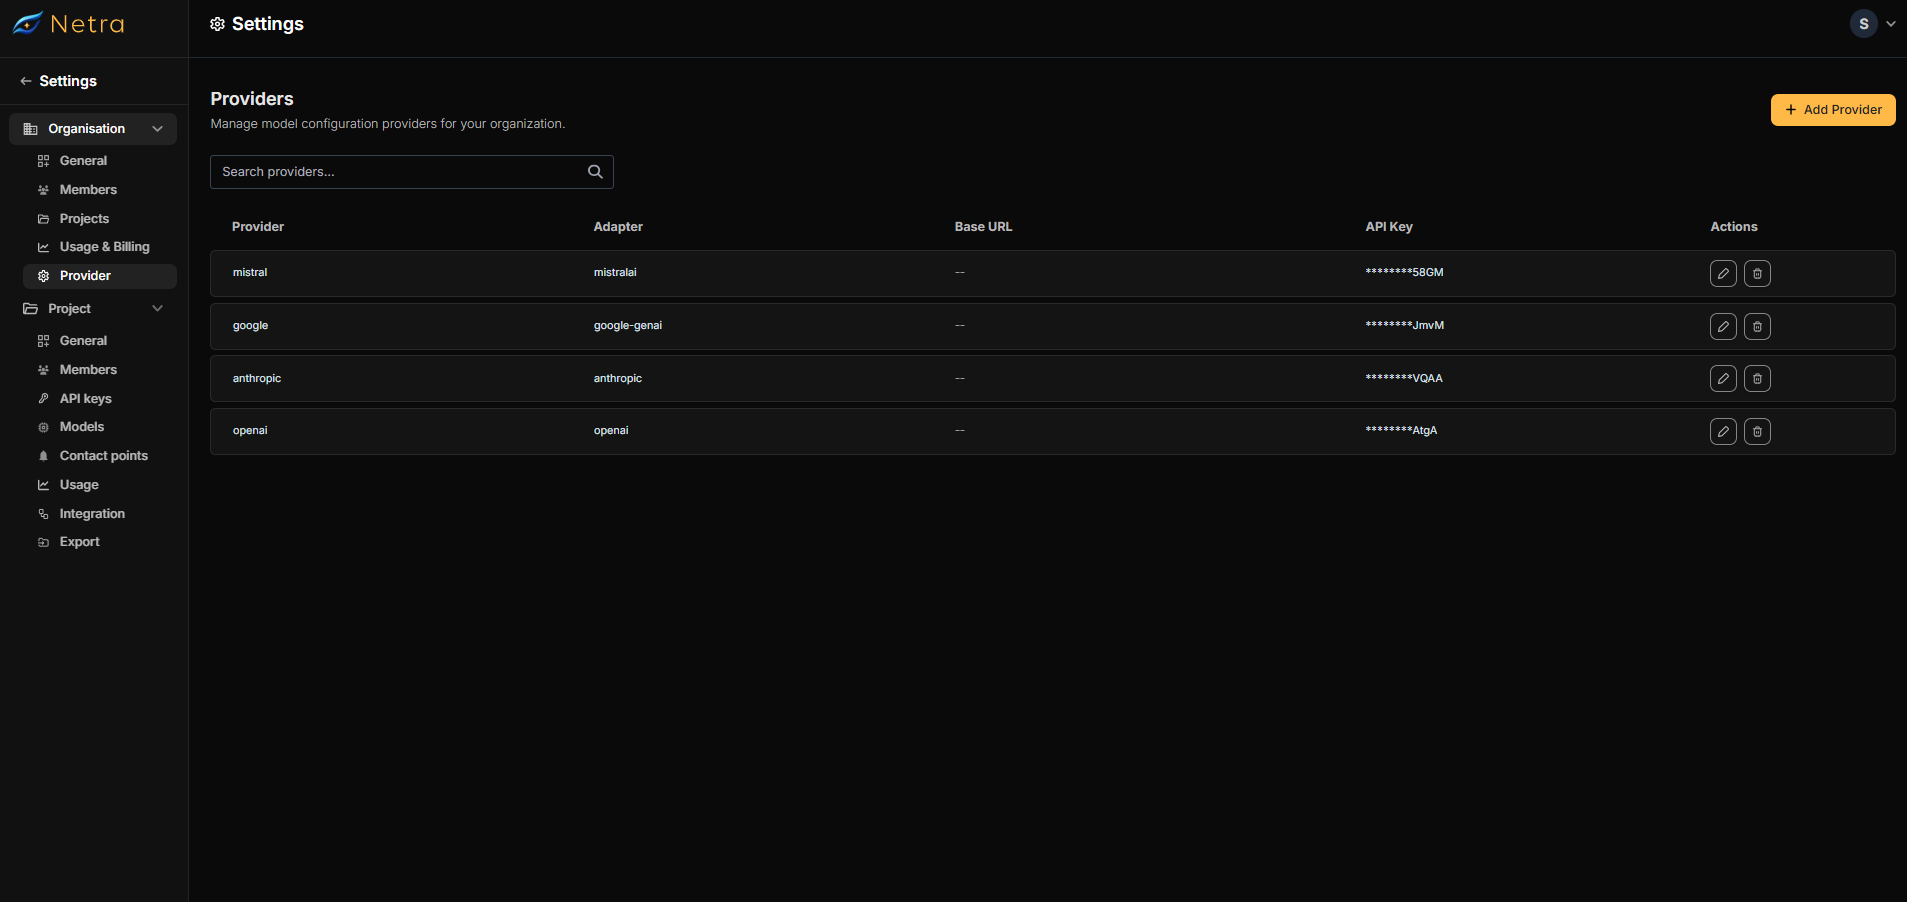 Manage your AI model providers and their configurations in one place. This section allows you to connect and configure different AI providers that your organization will use for various AI tasks.
## Available Adapters
Netra supports the following provider adapters:
* **Mistral AI**
* **OpenAI**
* **Google GenAI**
* **Anthropic**
## Provider Management
### Viewing Provider Details
For each configured provider, you can view:
* **Provider Name**: Your reference name for this configuration
* **Adapter Type**: The AI service being used (Mistral AI, OpenAI, Google GenAI, or Anthropic)
* **Base URL**: The endpoint URL for API requests (if custom)
* **API Key**: Indicates if a valid API key is configured
* **Action items**: An edit and delete button
### Editing Provider Configuration
Click the **Edit Provider** button to modify advanced settings:
Click the edit icon next to the provider you want to configure.
* **Base URL**: The custom endpoint URL for API requests
* *Note*: Only modify if you're using a custom endpoint or proxy
* **Embedding Models** (Not available for Anthropic):
* Add custom embedding model names
* Format: `model-name` or `provider/model-name`
* **LLM Judge Models**:
* Add custom model names for evaluation
* Used for automated quality assessment
Click "Save" to apply your configuration.
### Adding a New Provider
Click the **Add Provider** button.
* **Provider Name**: Enter a descriptive name (e.g., "Production OpenAI")
* **Adapter**: Select from the dropdown (Mistral AI, OpenAI, Google GenAI, or Anthropic)
* **API Key**: Enter your API key
* **Base URL**: Only required for custom endpoints or proxies
* **Custom Models**:
* Add embedding models (except for Anthropic)
* Configure LLM judge models for evaluation
Click **Create Provider** to save your configuration.
## Configuration Details
### Base URL
* **What it is**: The endpoint URL where API requests are sent
* **When to set**: Only required if you're using a custom endpoint or proxy
* **Default**: Automatically uses the official provider endpoint if left blank
### Embedding Models
* **What it is**: Custom models for generating text embeddings
* **Availability**: Not available for Anthropic provider
* **Use case**: When you need to use custom or fine-tuned embedding models
### LLM Judge Custom Models
* **What it is**: Models used for automated evaluation and quality assessment
* **Use case**: Running automated tests and quality checks on model outputs
Manage your AI model providers and their configurations in one place. This section allows you to connect and configure different AI providers that your organization will use for various AI tasks.
## Available Adapters
Netra supports the following provider adapters:
* **Mistral AI**
* **OpenAI**
* **Google GenAI**
* **Anthropic**
## Provider Management
### Viewing Provider Details
For each configured provider, you can view:
* **Provider Name**: Your reference name for this configuration
* **Adapter Type**: The AI service being used (Mistral AI, OpenAI, Google GenAI, or Anthropic)
* **Base URL**: The endpoint URL for API requests (if custom)
* **API Key**: Indicates if a valid API key is configured
* **Action items**: An edit and delete button
### Editing Provider Configuration
Click the **Edit Provider** button to modify advanced settings:
Click the edit icon next to the provider you want to configure.
* **Base URL**: The custom endpoint URL for API requests
* *Note*: Only modify if you're using a custom endpoint or proxy
* **Embedding Models** (Not available for Anthropic):
* Add custom embedding model names
* Format: `model-name` or `provider/model-name`
* **LLM Judge Models**:
* Add custom model names for evaluation
* Used for automated quality assessment
Click "Save" to apply your configuration.
### Adding a New Provider
Click the **Add Provider** button.
* **Provider Name**: Enter a descriptive name (e.g., "Production OpenAI")
* **Adapter**: Select from the dropdown (Mistral AI, OpenAI, Google GenAI, or Anthropic)
* **API Key**: Enter your API key
* **Base URL**: Only required for custom endpoints or proxies
* **Custom Models**:
* Add embedding models (except for Anthropic)
* Configure LLM judge models for evaluation
Click **Create Provider** to save your configuration.
## Configuration Details
### Base URL
* **What it is**: The endpoint URL where API requests are sent
* **When to set**: Only required if you're using a custom endpoint or proxy
* **Default**: Automatically uses the official provider endpoint if left blank
### Embedding Models
* **What it is**: Custom models for generating text embeddings
* **Availability**: Not available for Anthropic provider
* **Use case**: When you need to use custom or fine-tuned embedding models
### LLM Judge Custom Models
* **What it is**: Models used for automated evaluation and quality assessment
* **Use case**: Running automated tests and quality checks on model outputs